

How we page
When something goes wrong, it’s essential to involve the right people immediately. Paging or escalation can happen automatically from your alert source or manually by someone initiating a page or an incident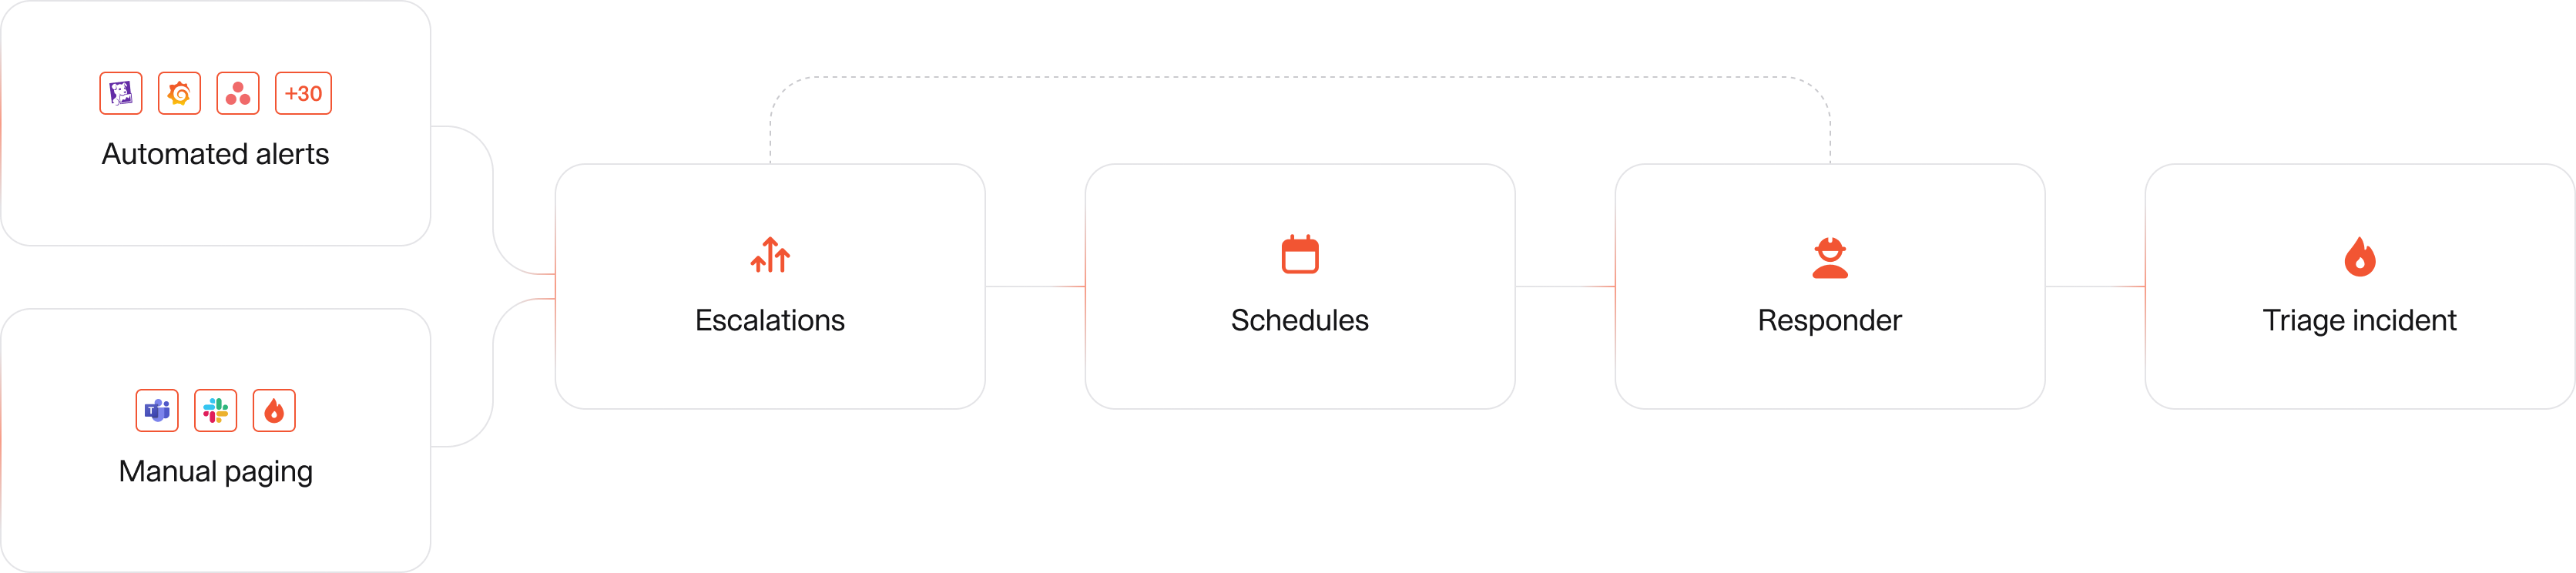
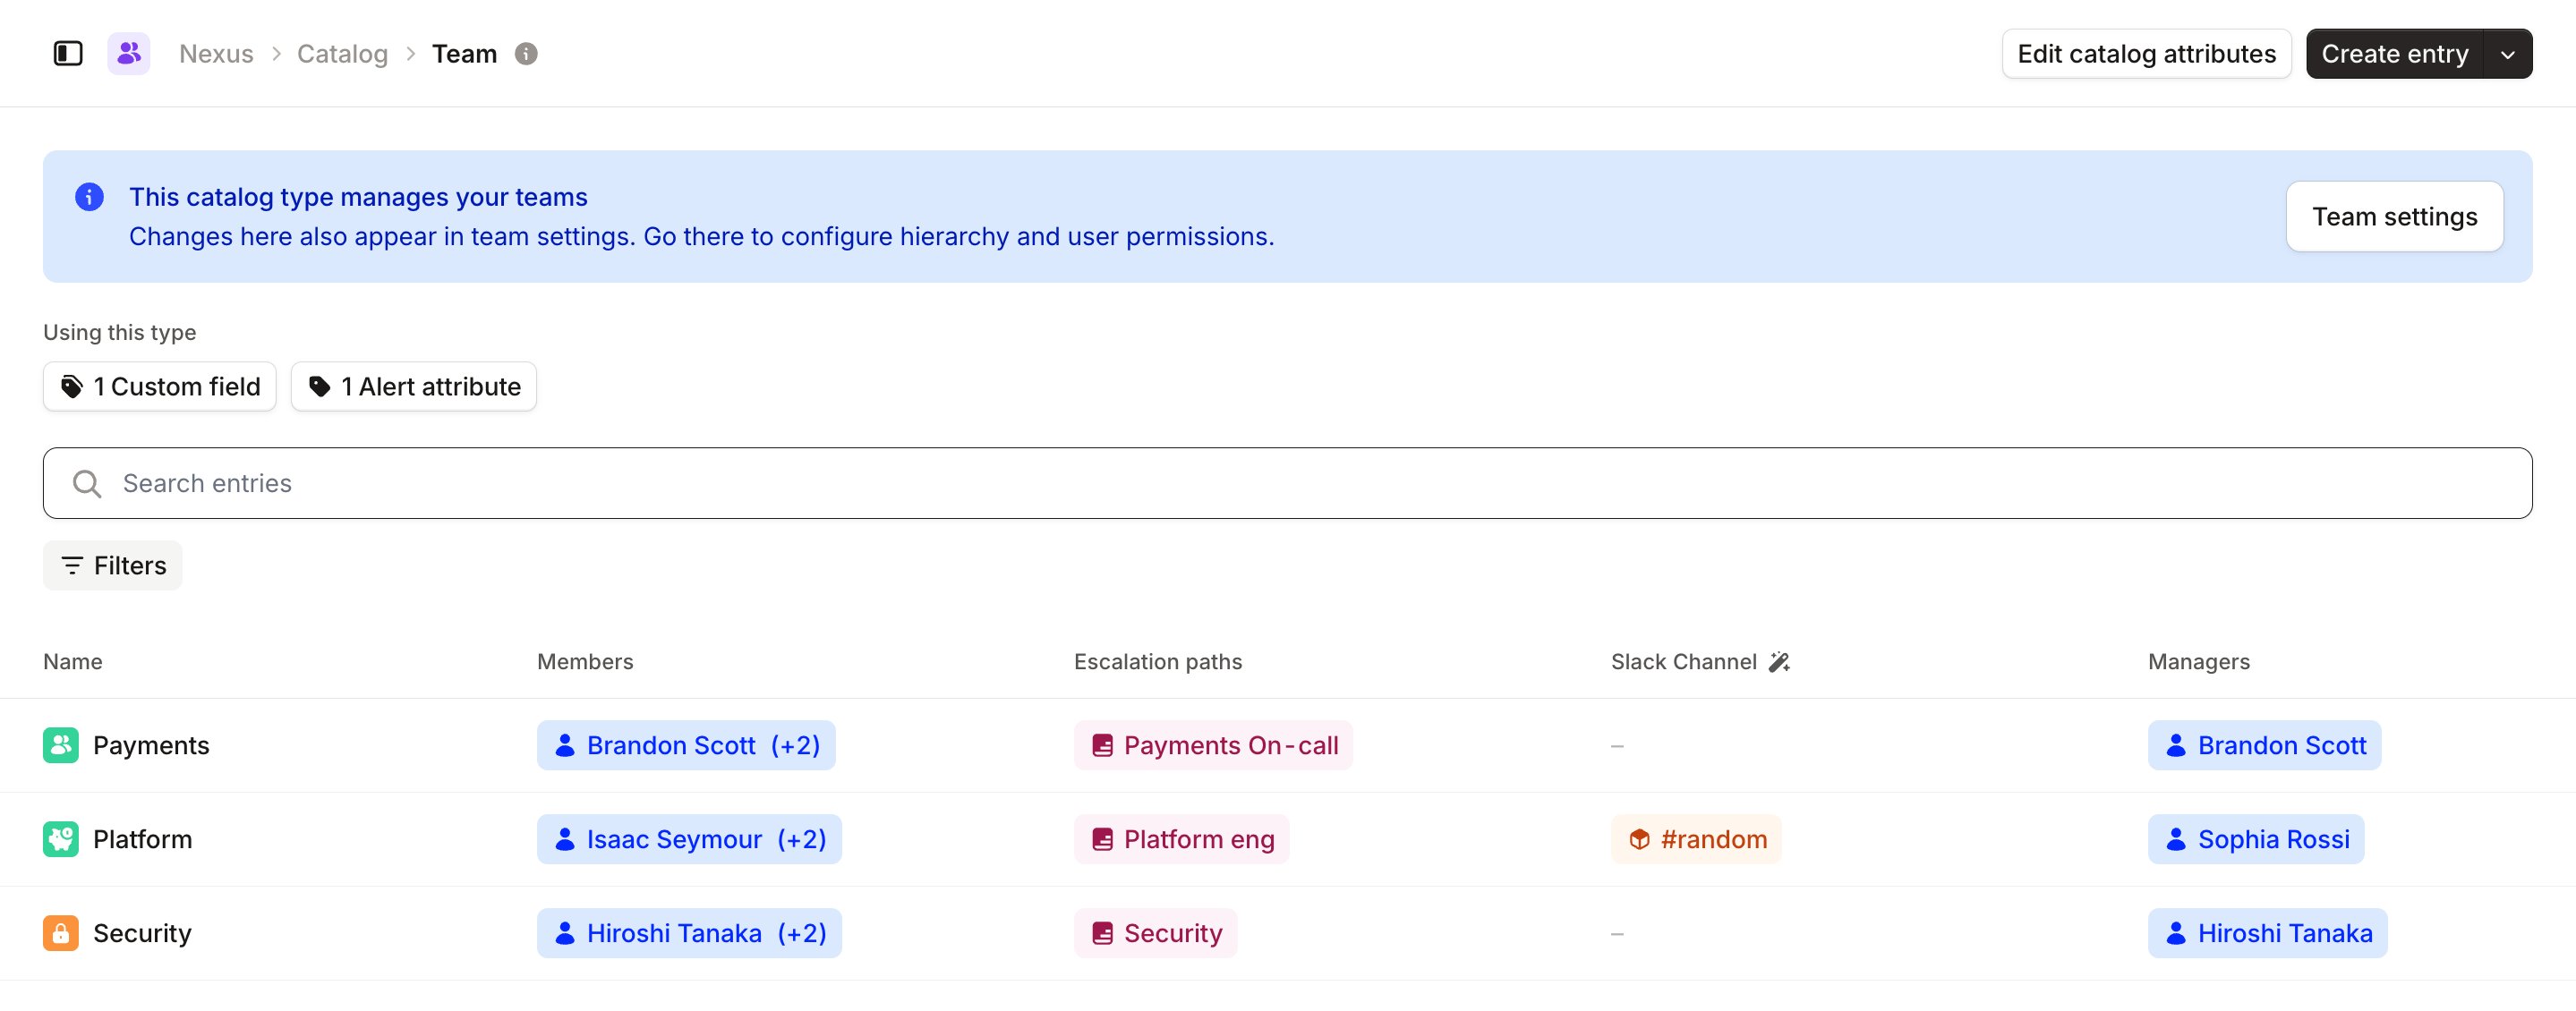
If you attach teams to your escalation paths, we will automatically add this link to Catalog for you, to make paging by team easier.
Escalating and creating incidents automatically from your alerts
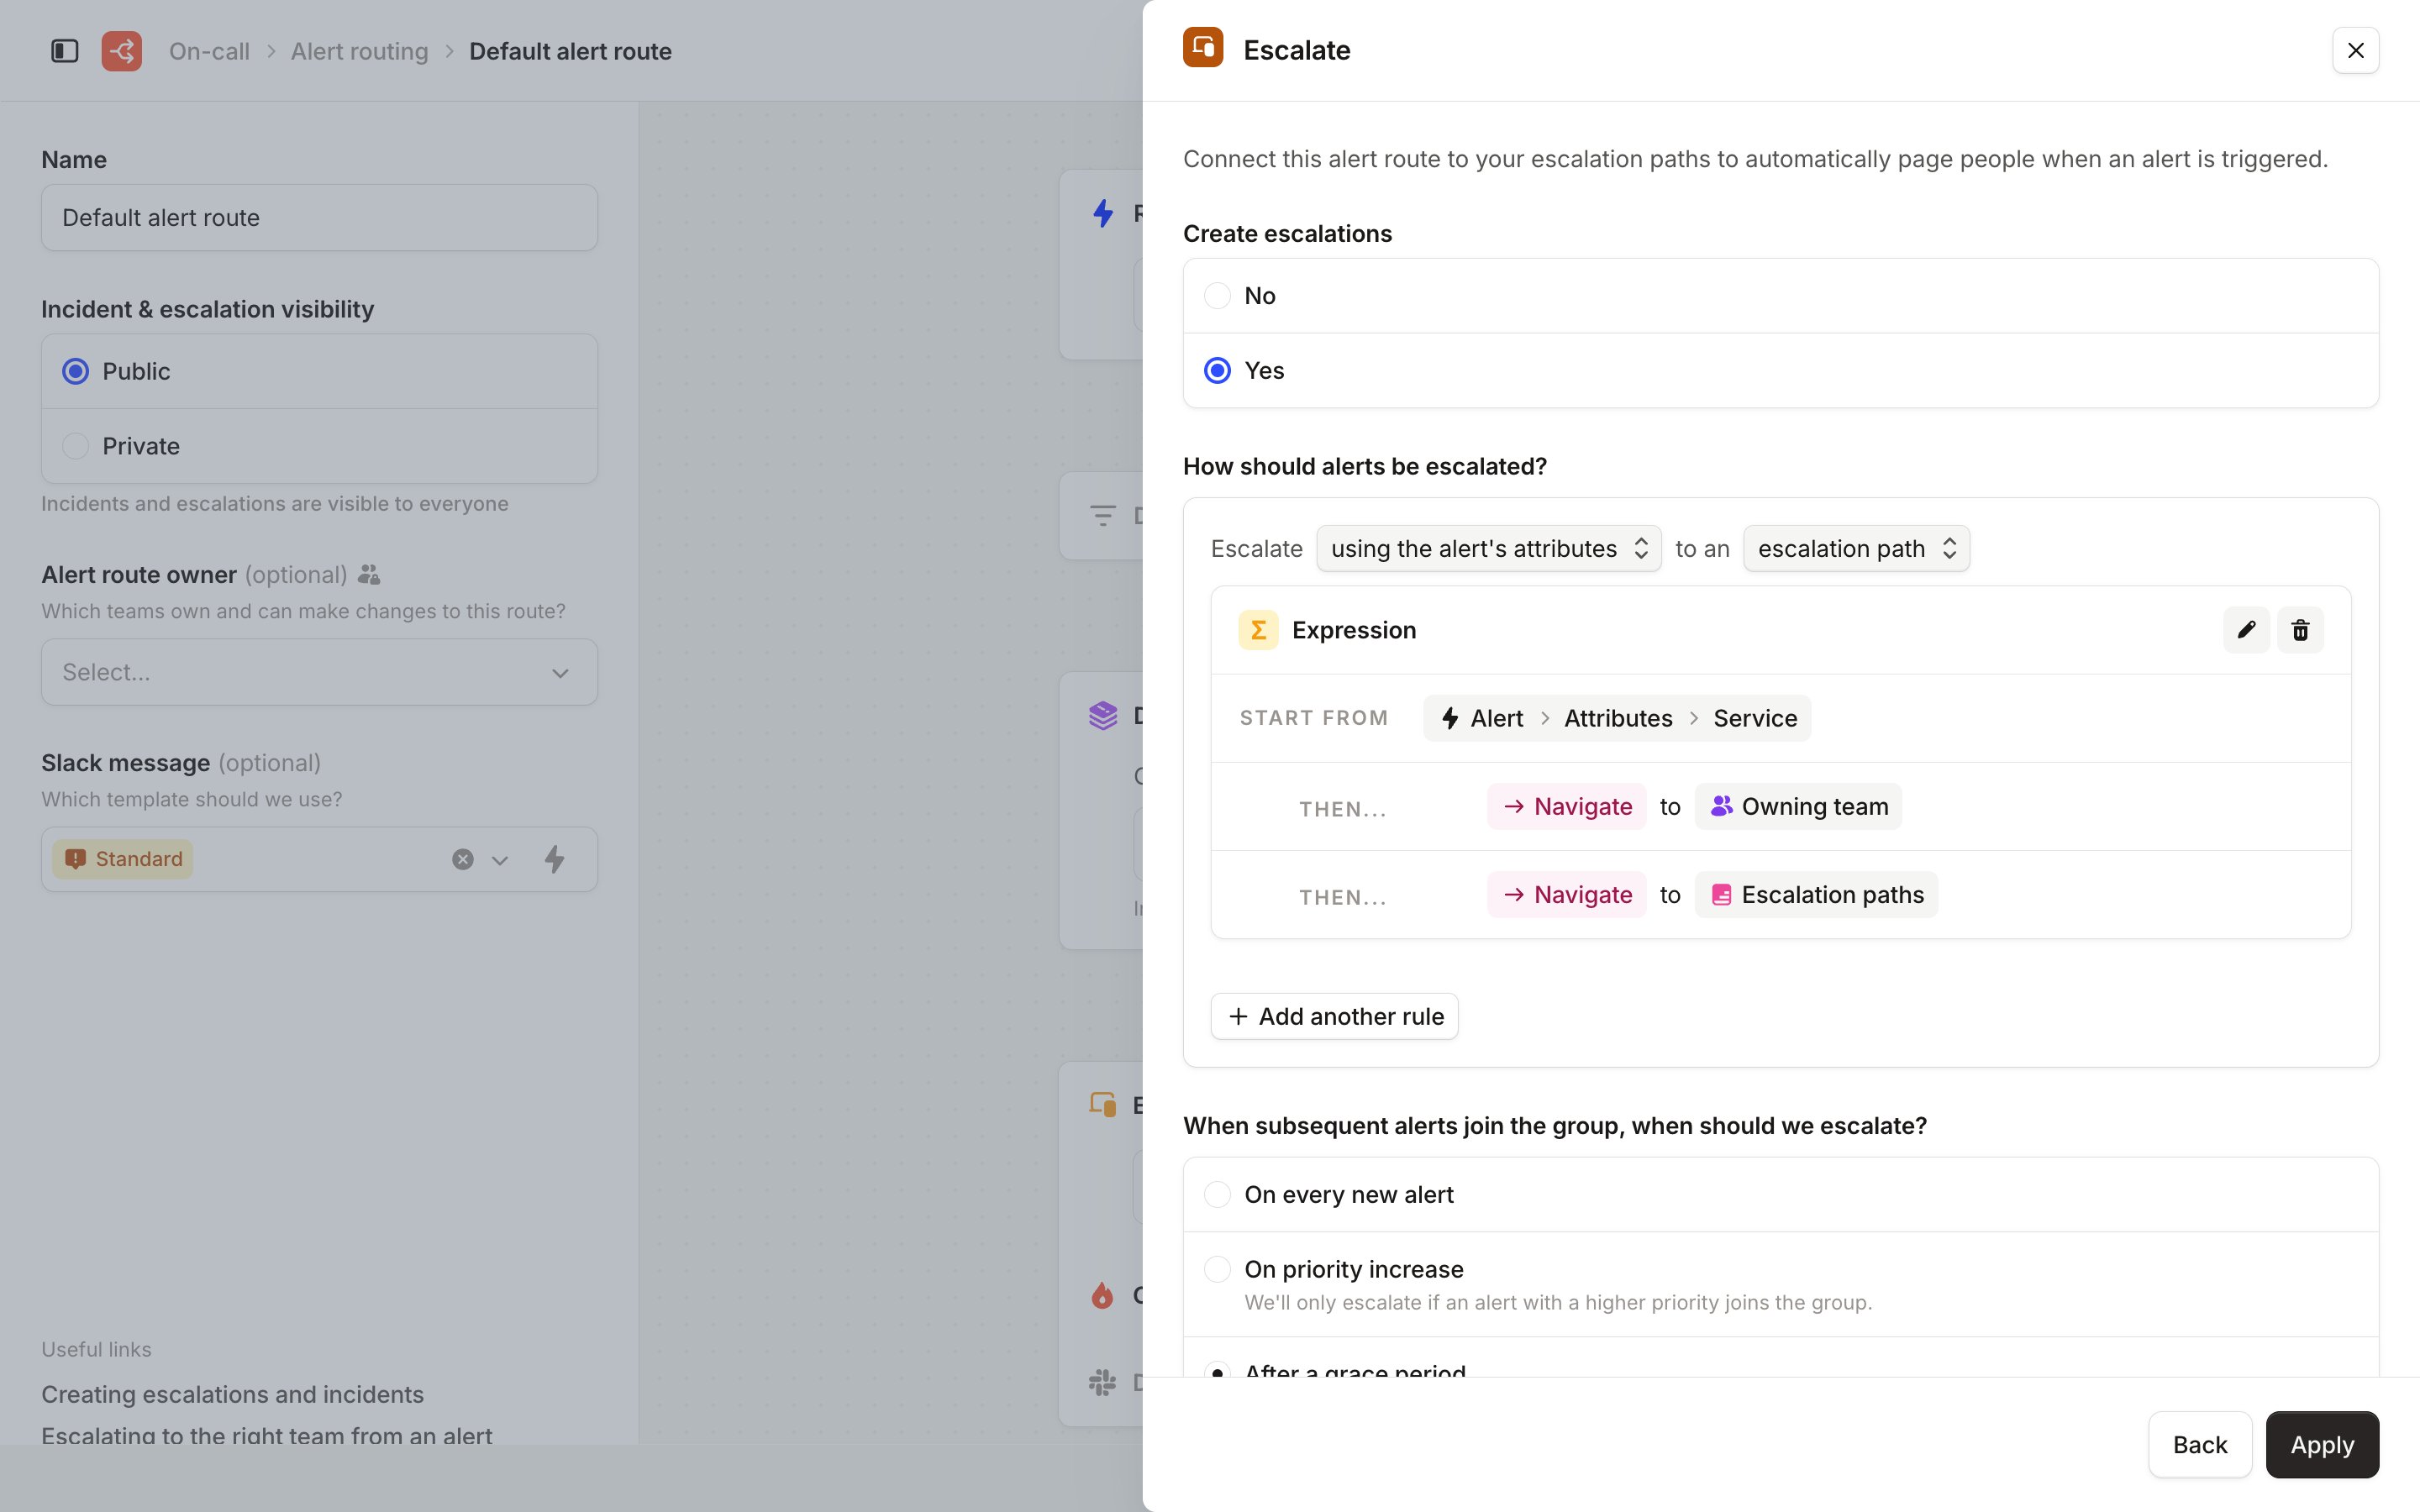
Once your Catalog is set up with types connected to escalation paths, you can configure Alert Routing to dynamically route escalations to the appropriate team and individual. This means that you can use one route for even 100 teams without creating separate configurations for each.- Head to On-call → Alert routing and open your alert route
- Open the Escalate step
- Set Create escalations to Yes
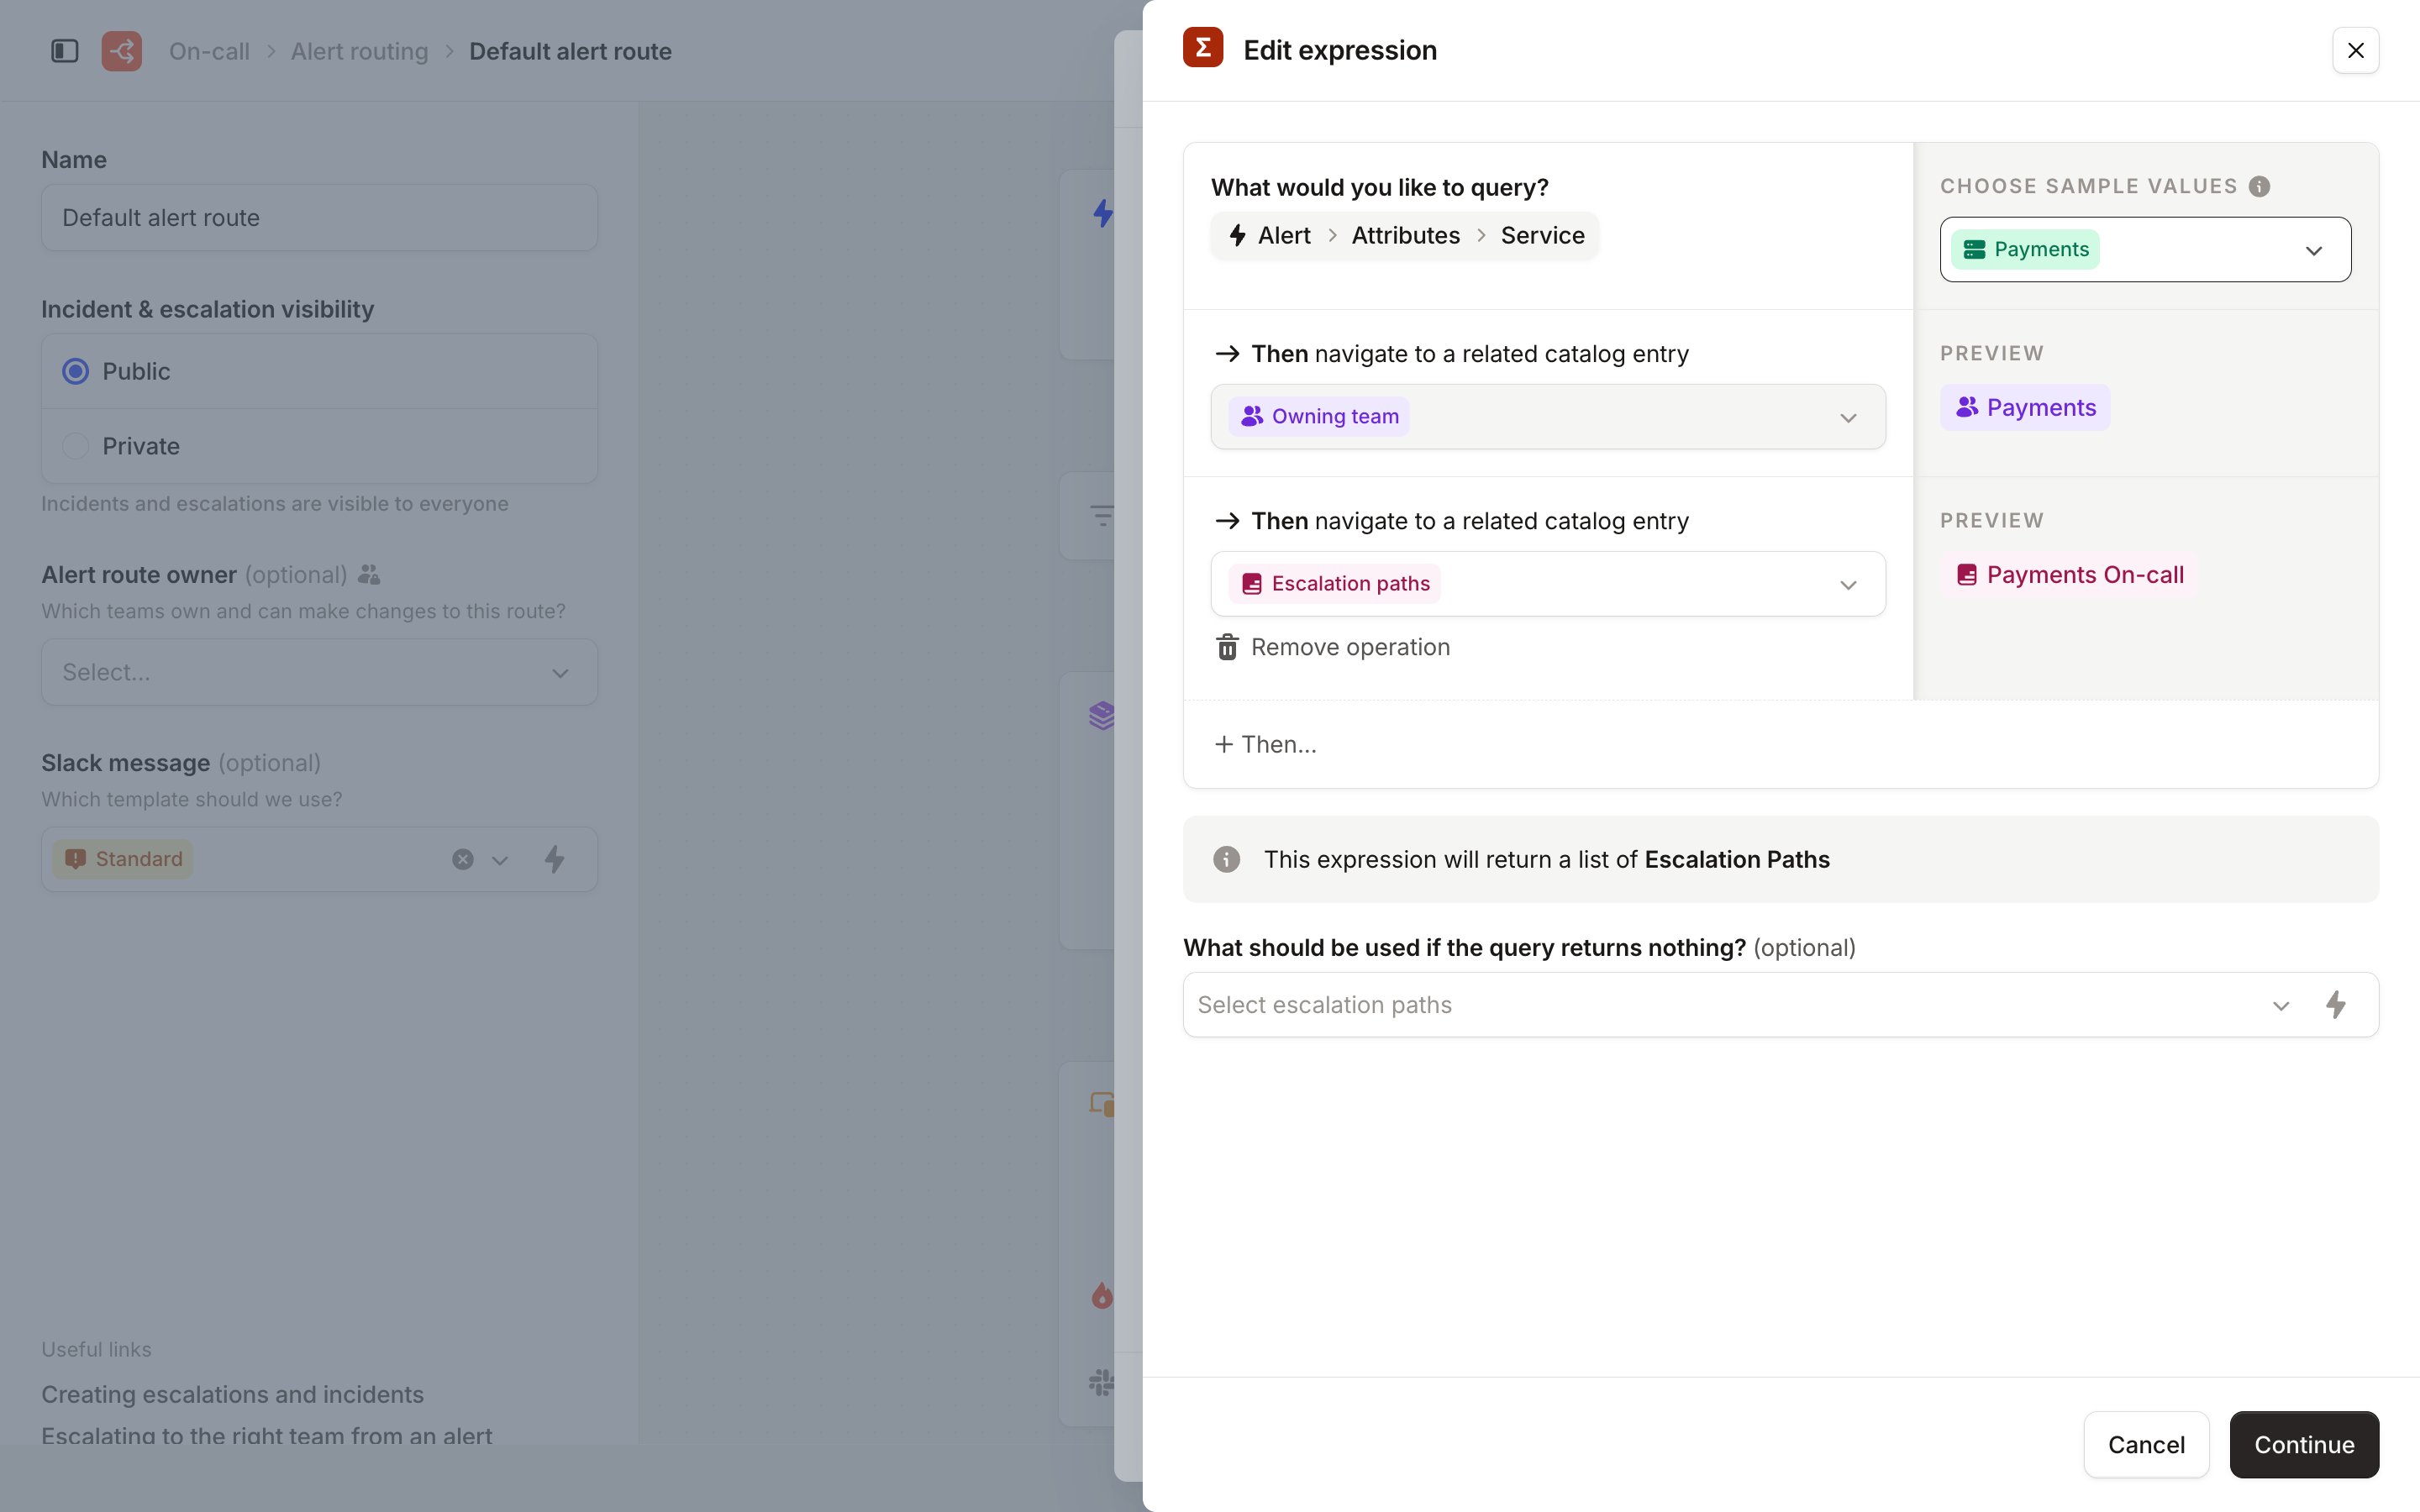
- Under How should alerts be escalated?, escalate using the alert’s attributes to an escalation path
- Build the expression: start from Alert → Attributes → Service, then navigate to Owning team, then to Escalation paths
- Hit Apply
Learn how to automatically escalate and create incidents here.
Escalating and creating incidents manually
When a customer reports an issue, team members often need to manually escalate or create an incident. They can do this through the web dashboard or by using the/inc or /inc escalate commands. With Catalog, customer-facing teams don’t need to know exactly who owns a feature; they can simply escalate based on the feature, and the Catalog will route it to the correct team.
Learn how to manually escalate and create incidents here.
Configuring your Catalog
To set up your Catalog with On-call, we’ve created simple defaults to help you get started. In this section, we’ll share some example structures to guide you along the way!1. Determine the structure of your Catalog
The structure of your Catalog depends on your system and organization structure. A common simple structure is- Teams
- That own Services
- That power features
- Domains
- That includes teams
- That own Services
- That includes features
2. Create them as Catalog Types
After you have decided on which Types you need, it’s time to import those types from your third-party service catalog or manually create them.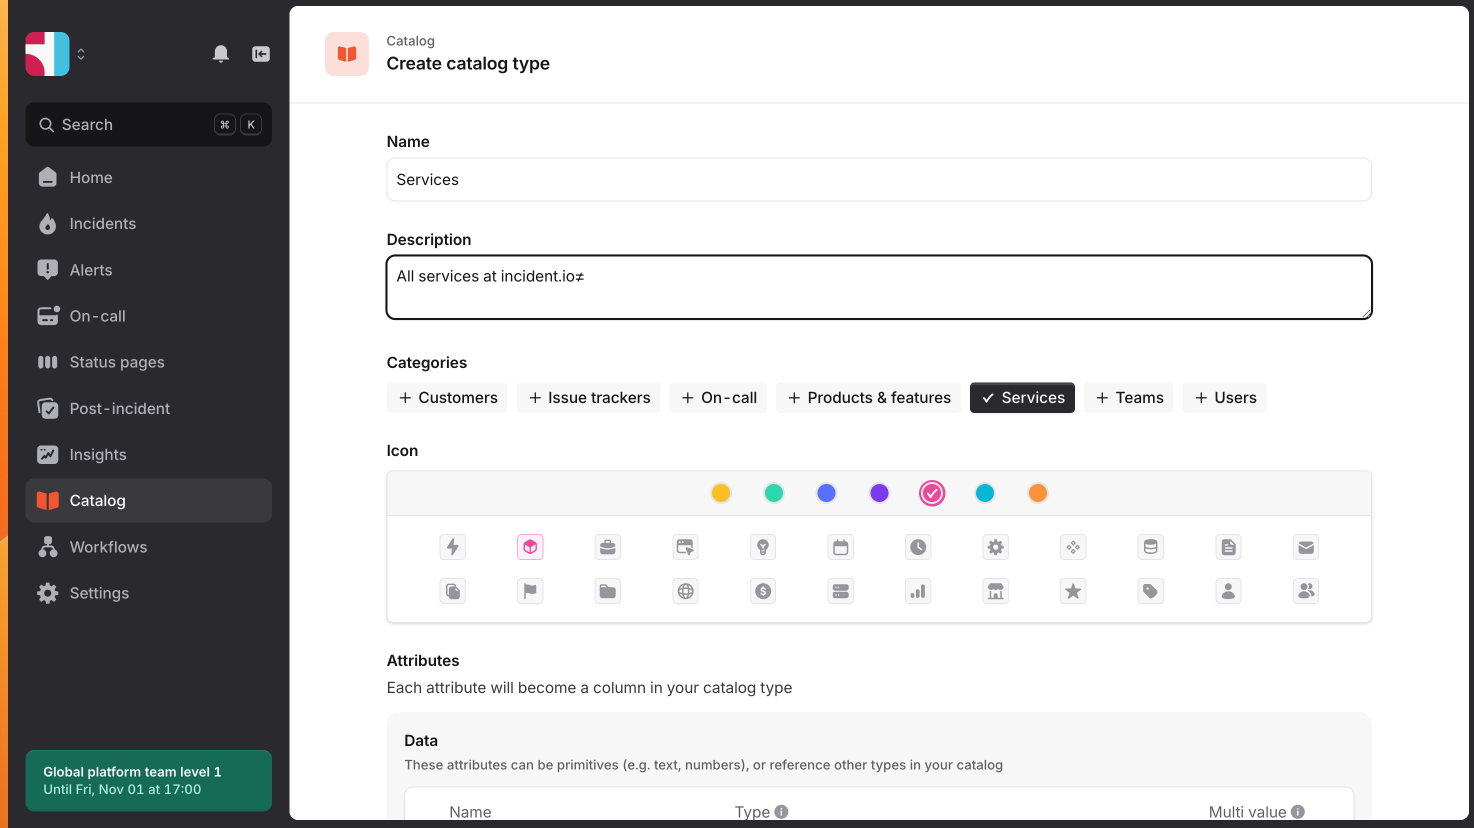
3. Connect types to Teams
To ensure your On-call configuration functions correctly, connect all necessary types using Attributes and Derived Attributes, which can be edited within each Type. Make sure the Type is selected from the Catalog and is not set as Text or String.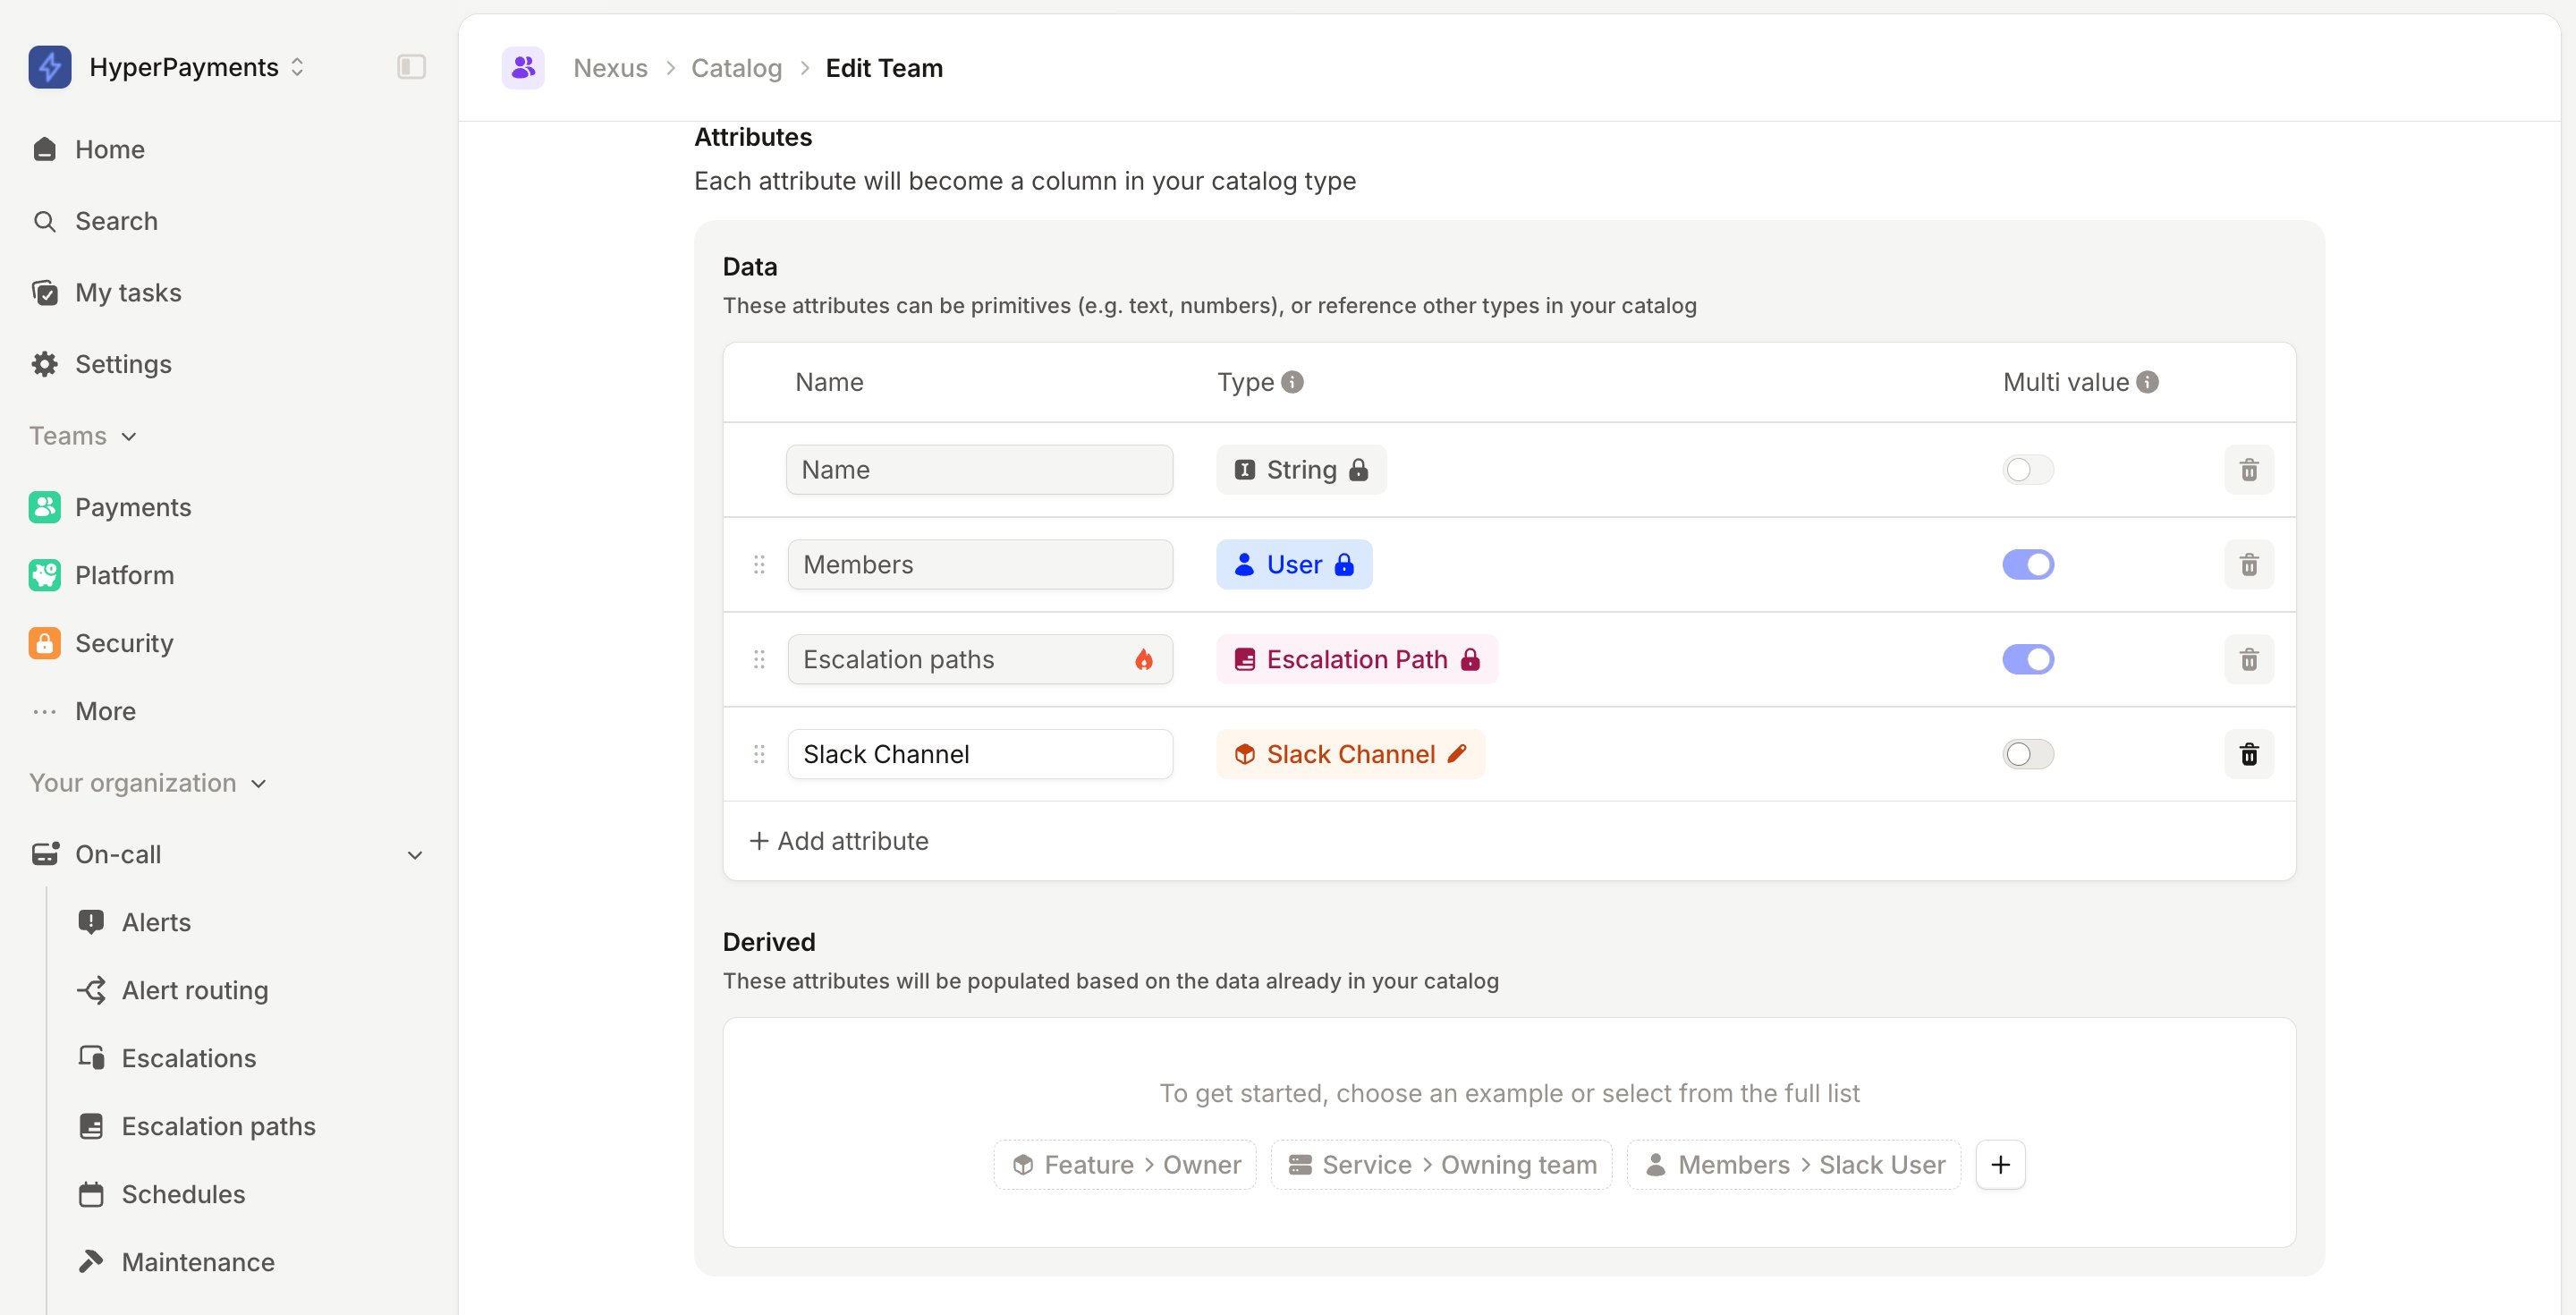
The Catalog is very flexible and can be used in thousands of different ways to suit your company, so please contact us if you have a specific use case you’d like to run through with us at support@incident.io.
Parsing Catalog values from alerts
To finalize setup, ensure the metadata from your alerts—such as labels—connects with the Catalog entries you’ve created for your types. Here are some examples of how alert metadata can map to your Catalog:- Alert → Service → Team → Escalation Path
- Alert → Feature → Team → Escalation Path
- Alert → Team → Escalation Path
- etc…
Attributes
When setting up your alert source, start by sending an initial payload that includes the typical metadata for your alerts. Next, organize this metadata so it can drive escalations and other automated actions on the platform—these elements are called Attributes. You can create Attributes that connect to Catalog types or store them as text as needed. If your Catalog is already configured, we’ll automatically identify matches and suggest attributes based on those entries.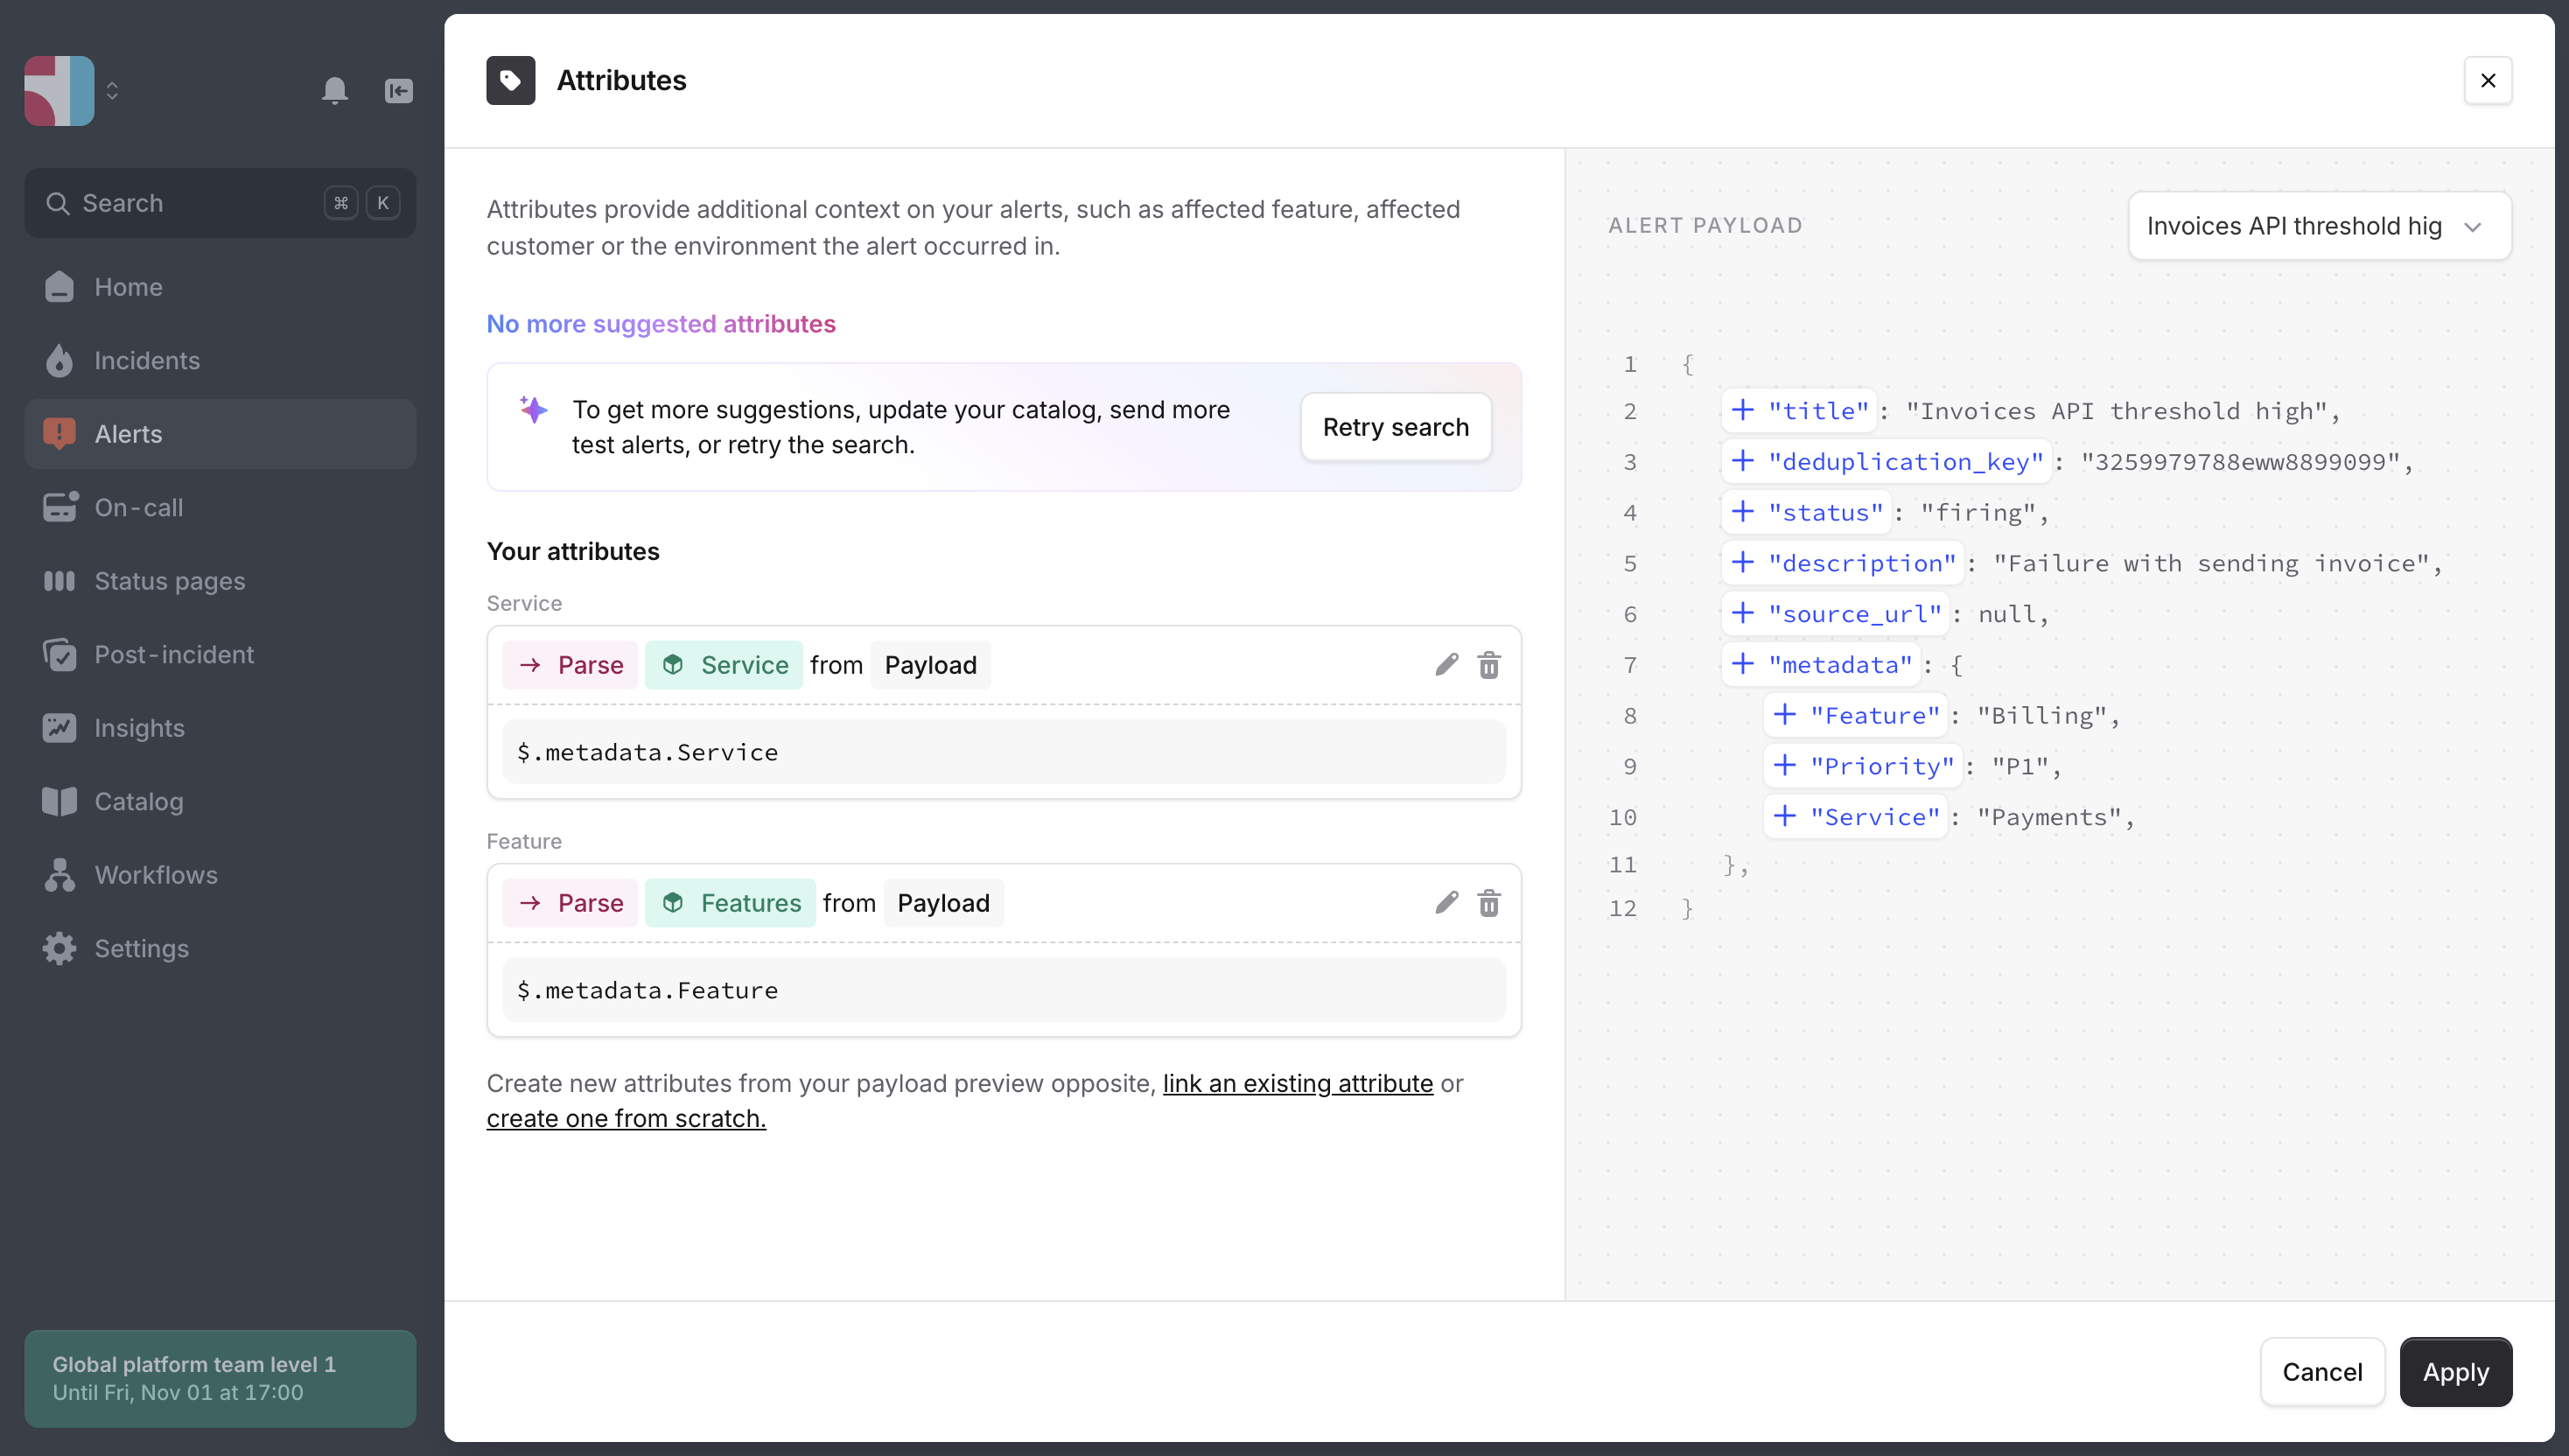
Aliases & External IDs
Sometimes, your payload may use different names or formats for the same metadata. The External ID is how your systems identify this entry, and it cannot be changed once set. Use Aliases to reference this Catalog entry across other tools. Aliases should be unique and permanent, allowing you to rename the Catalog entry without changing the alias.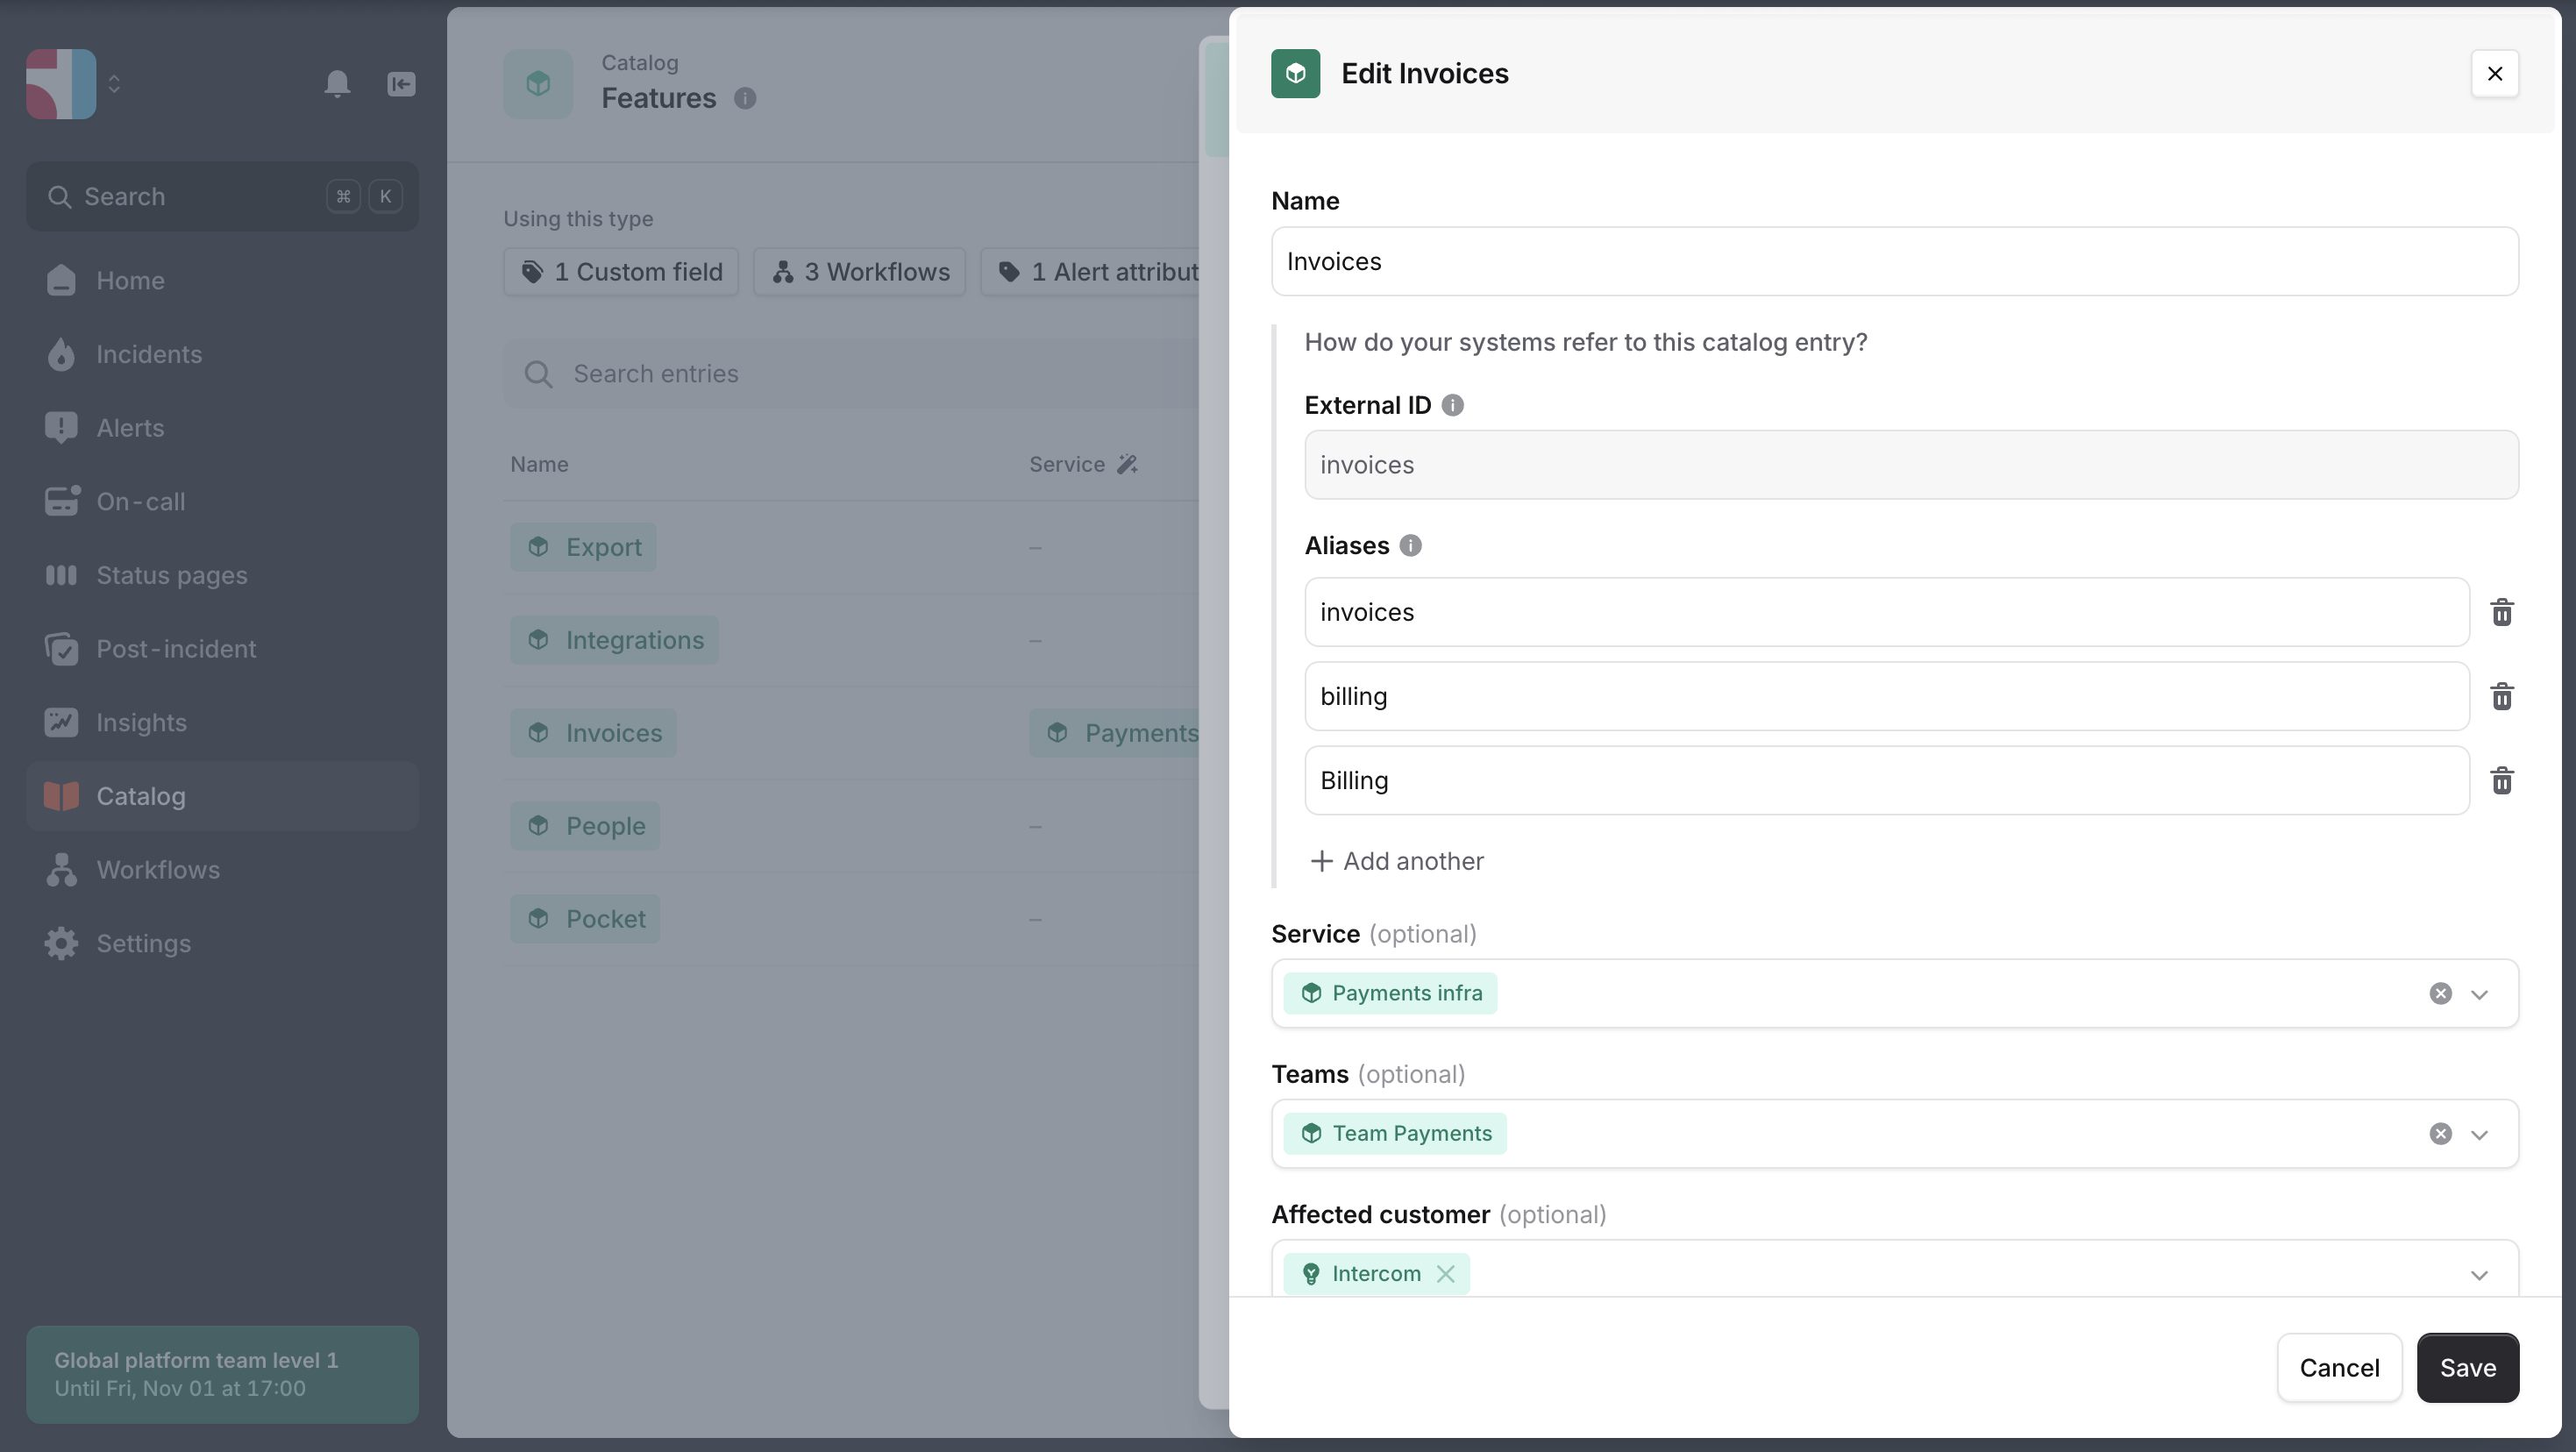
Aliases are helpful when names change, such as a team name update. This allows you to change the name of your type while adding the previous name as an alias, ensuring continued recognition without interruption.