Instructions
- Head over to the Alerts section in your incident.io dashboard

- Select the sources tab at the top of the page

- Press the Create source button

- Search for ‘Chronosphere’ and click continue to create the alert source

- Head over to the Chronosphere dashboard, and find the Notifiers page under the Alerts section in the menu bar
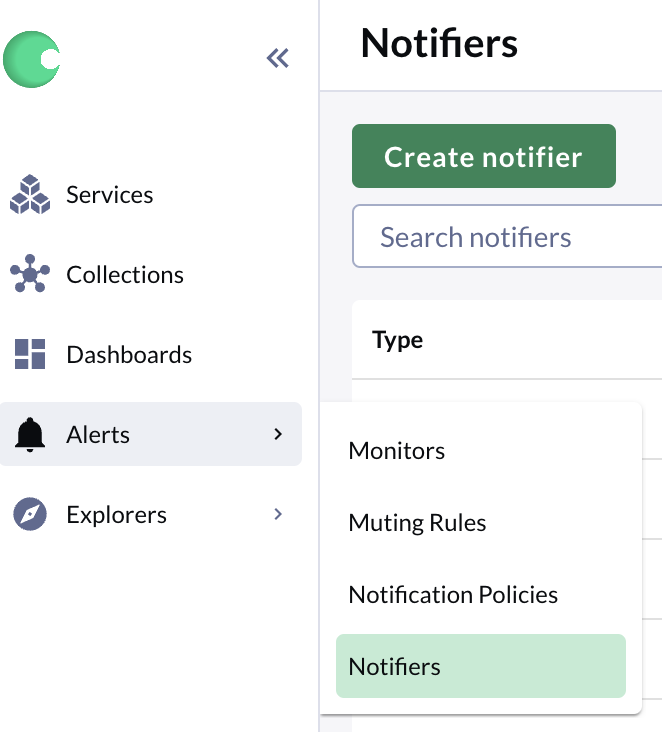
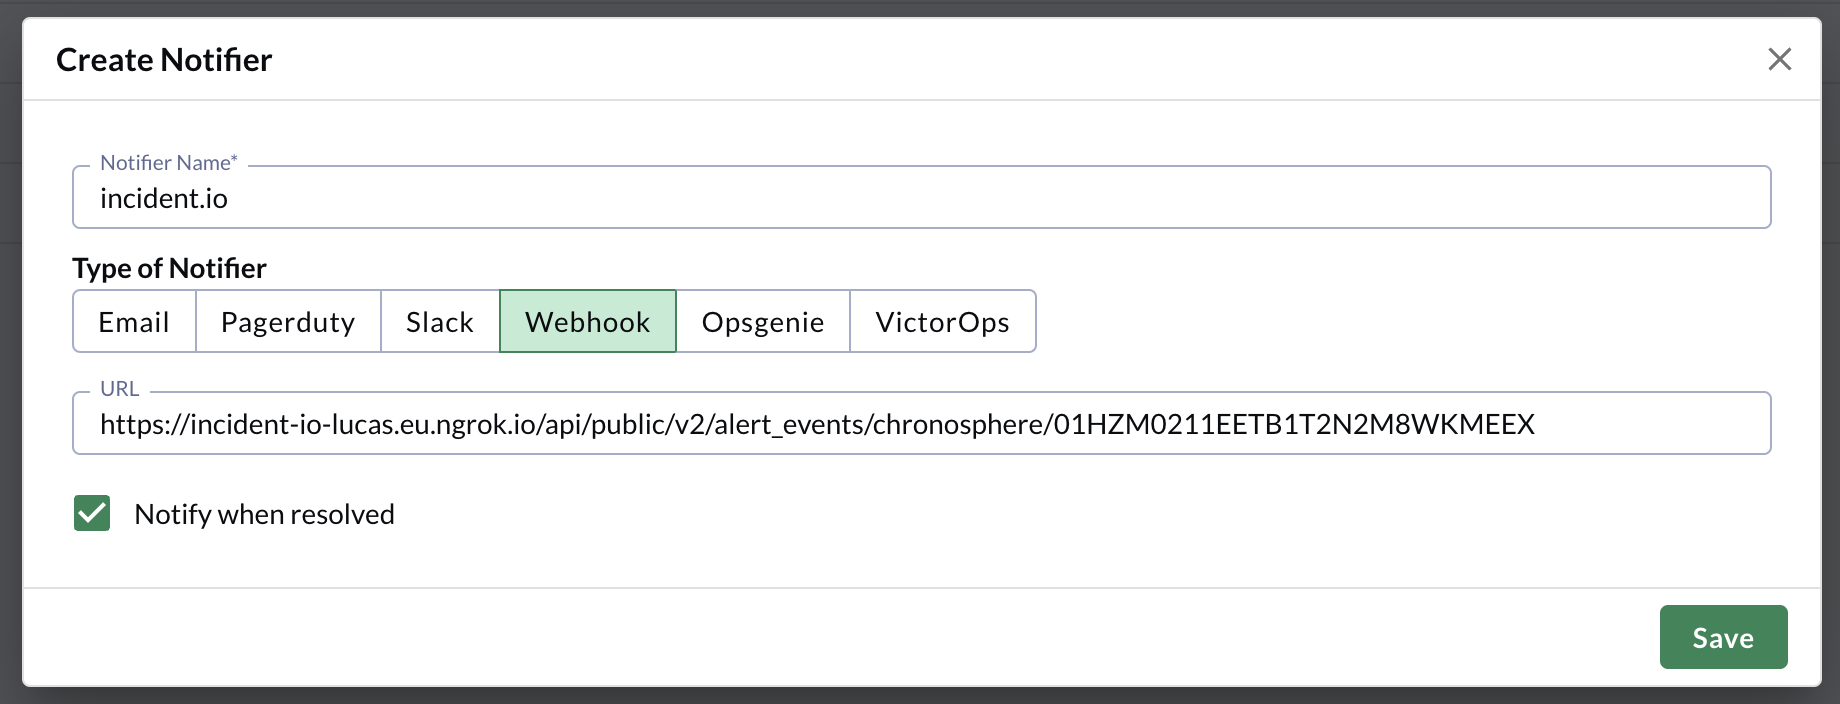
- Create a new notifier by clicking the green button which says ‘Create notifier’. Choose a name and select ‘Webhook’ as the type of notifier. Enter in the URL which we provide in the incident.io dashboard after completing step 4.
- After saving the notifier, go to the ‘Notification policies’ page which can be found in the Alerts section as in step 5, above ‘Notifiers’.
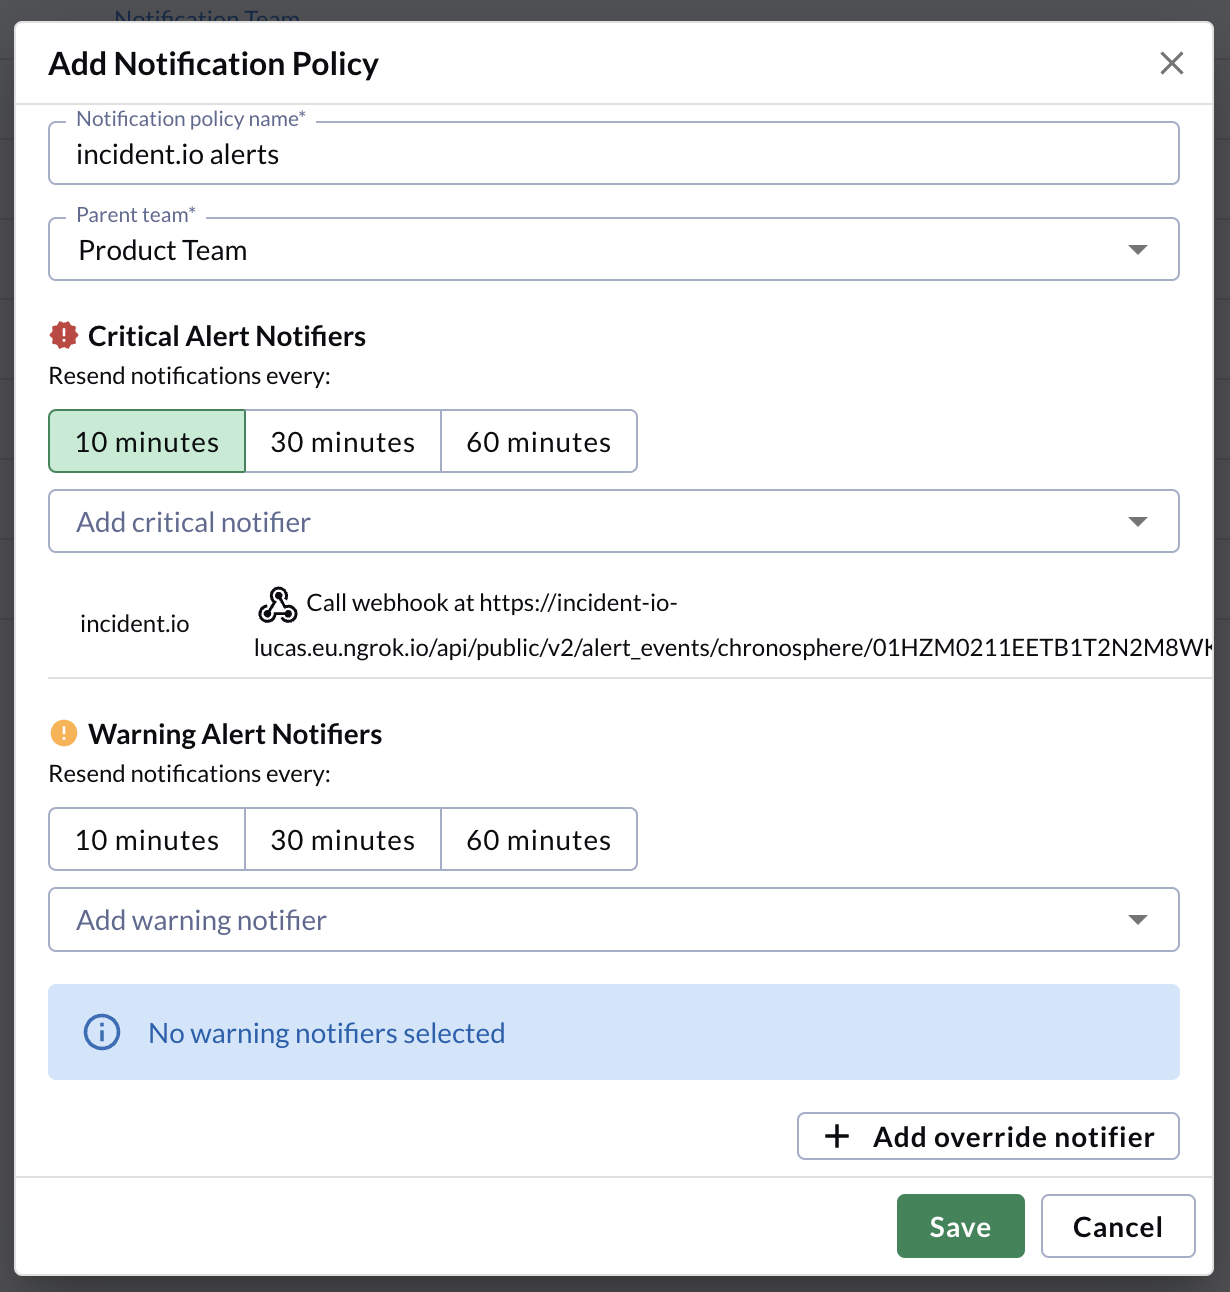
- Create a new Notification policy by clicking the green button which says ‘Create notification policy’. Choose your notification policy name and parent team, and then add incident.io (or whichever notifier you just set up) as a critical alert notifier. You may also wish to add it as a warning alert notifier.
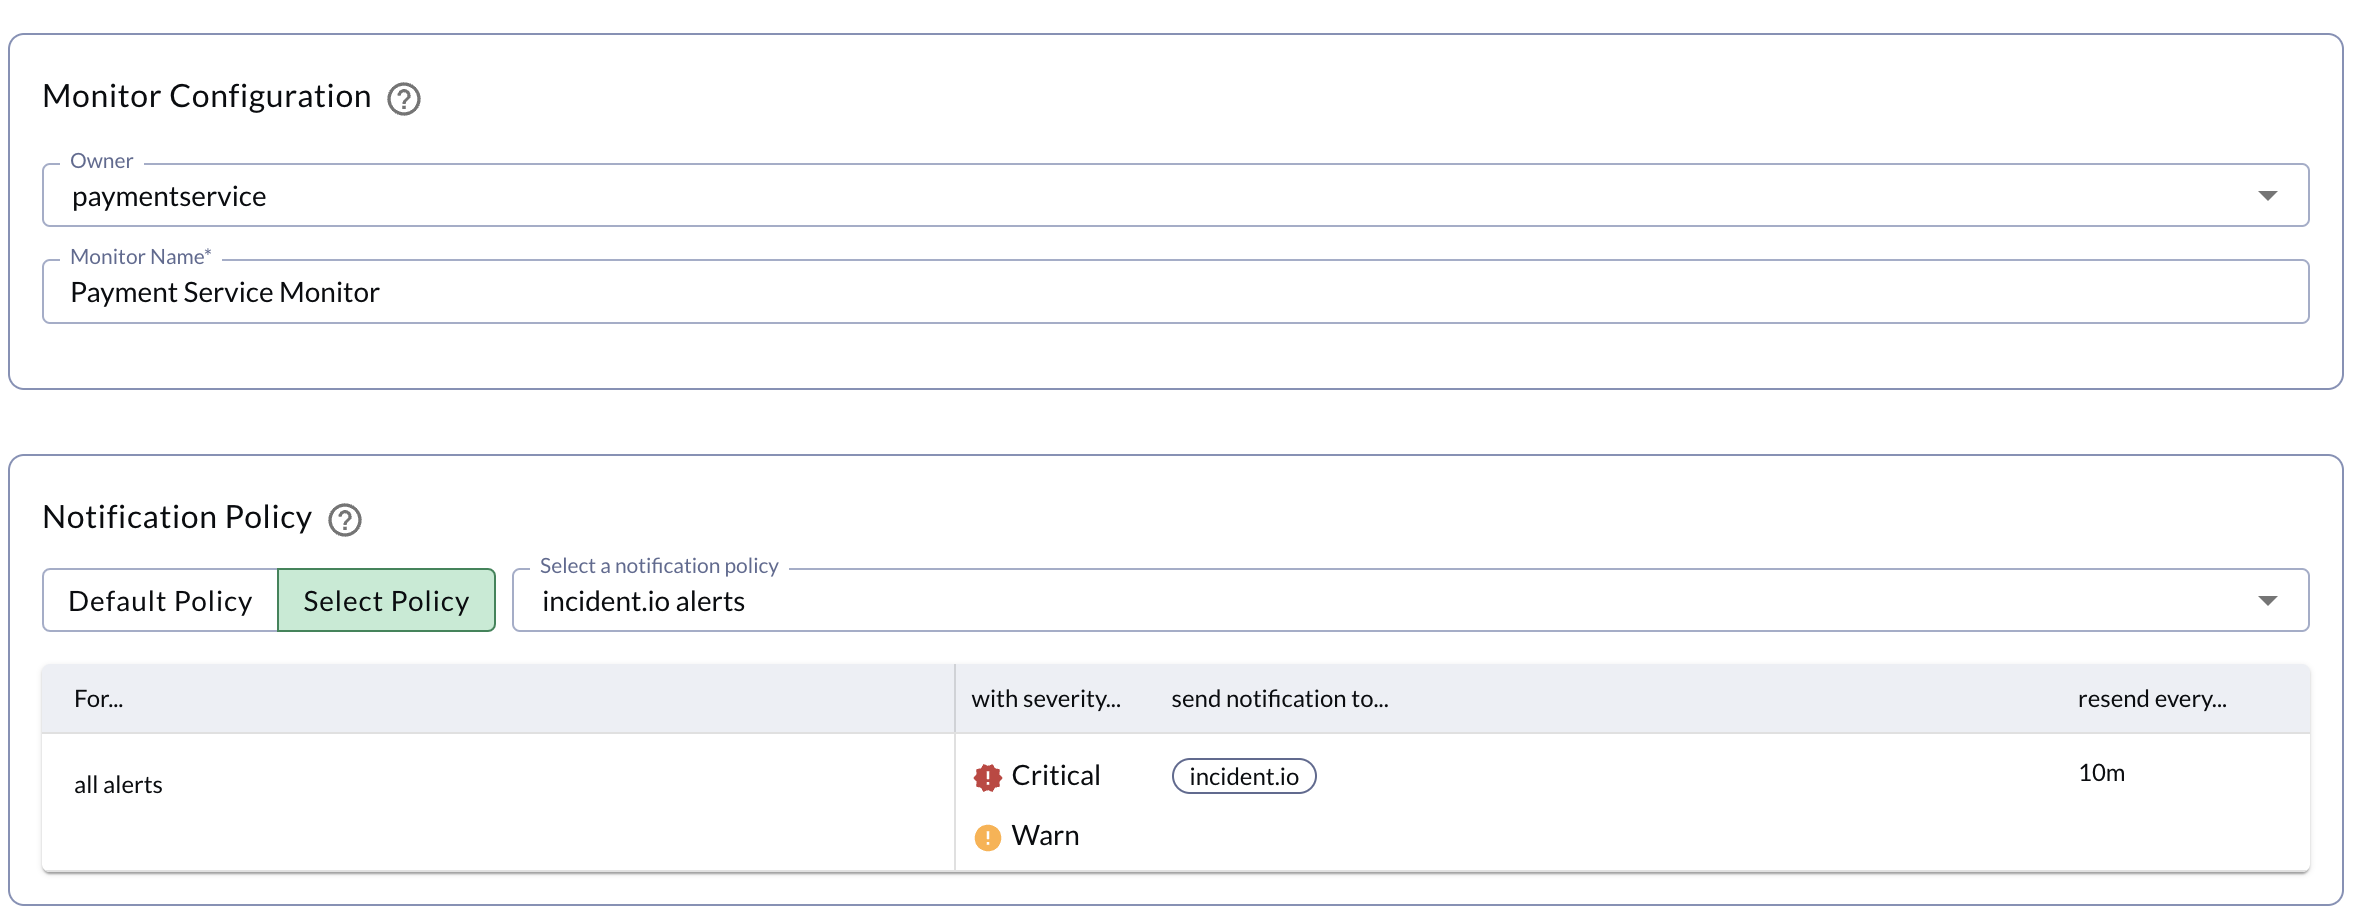
- Now, whenever you create a new monitor within Chronosphere, you can select your new notification policy, which will send alerts to the alert source that you set up in incident.io.