What our GitLab integration can do

  1. Export your incident follow-ups to GitLab
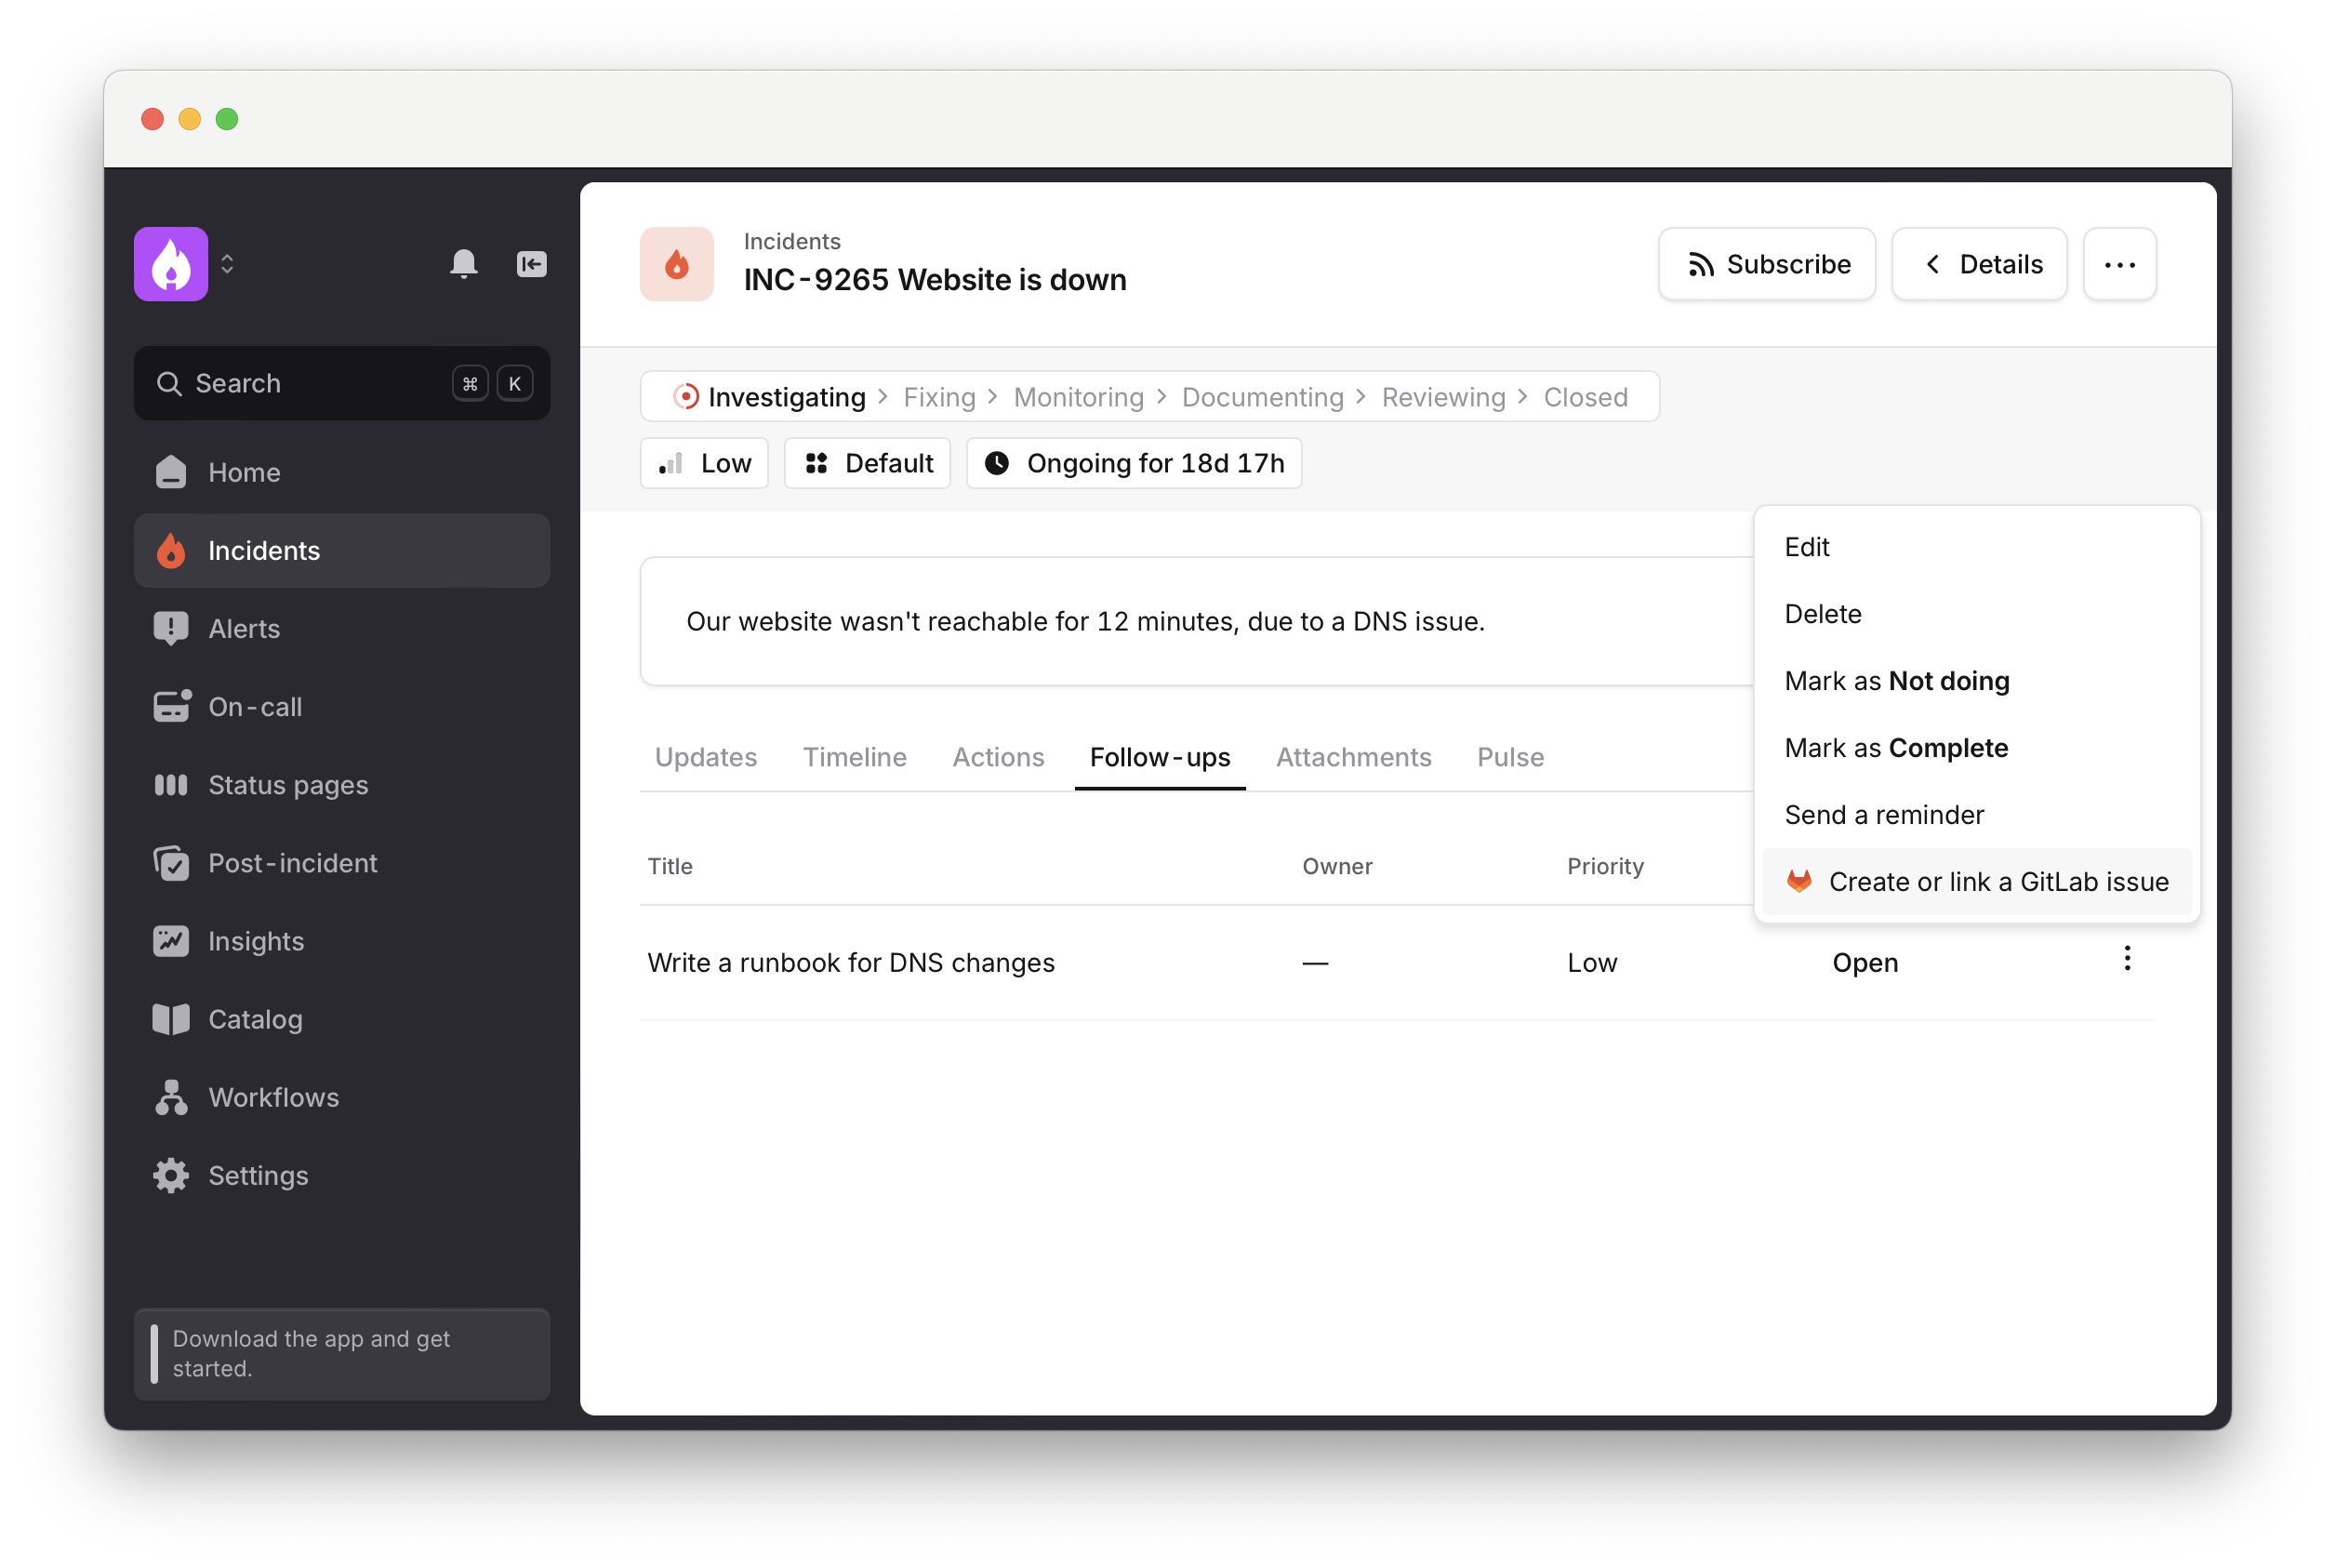
You can export your follow-ups to GitLab. We’ll sync the status of your tasks, so you can work in GitLab without worrying about updating statuses manually in incident.io!
Use auto-export follow-ups to make sure all your follow-up tasks are tracked in GitLab
You’ll see the option to export your follow-ups from the incident homepage: A follow-up row menu on the Follow-ups tab, open on Create or link a GitLab issue Changes in GitLab update the linked follow-up: the issue title, description, labels, and assignee as the follow-up owner. Closing the issue completes the follow-up, and records when it was closed.
  1. Link GitLab issues to your follow-ups.
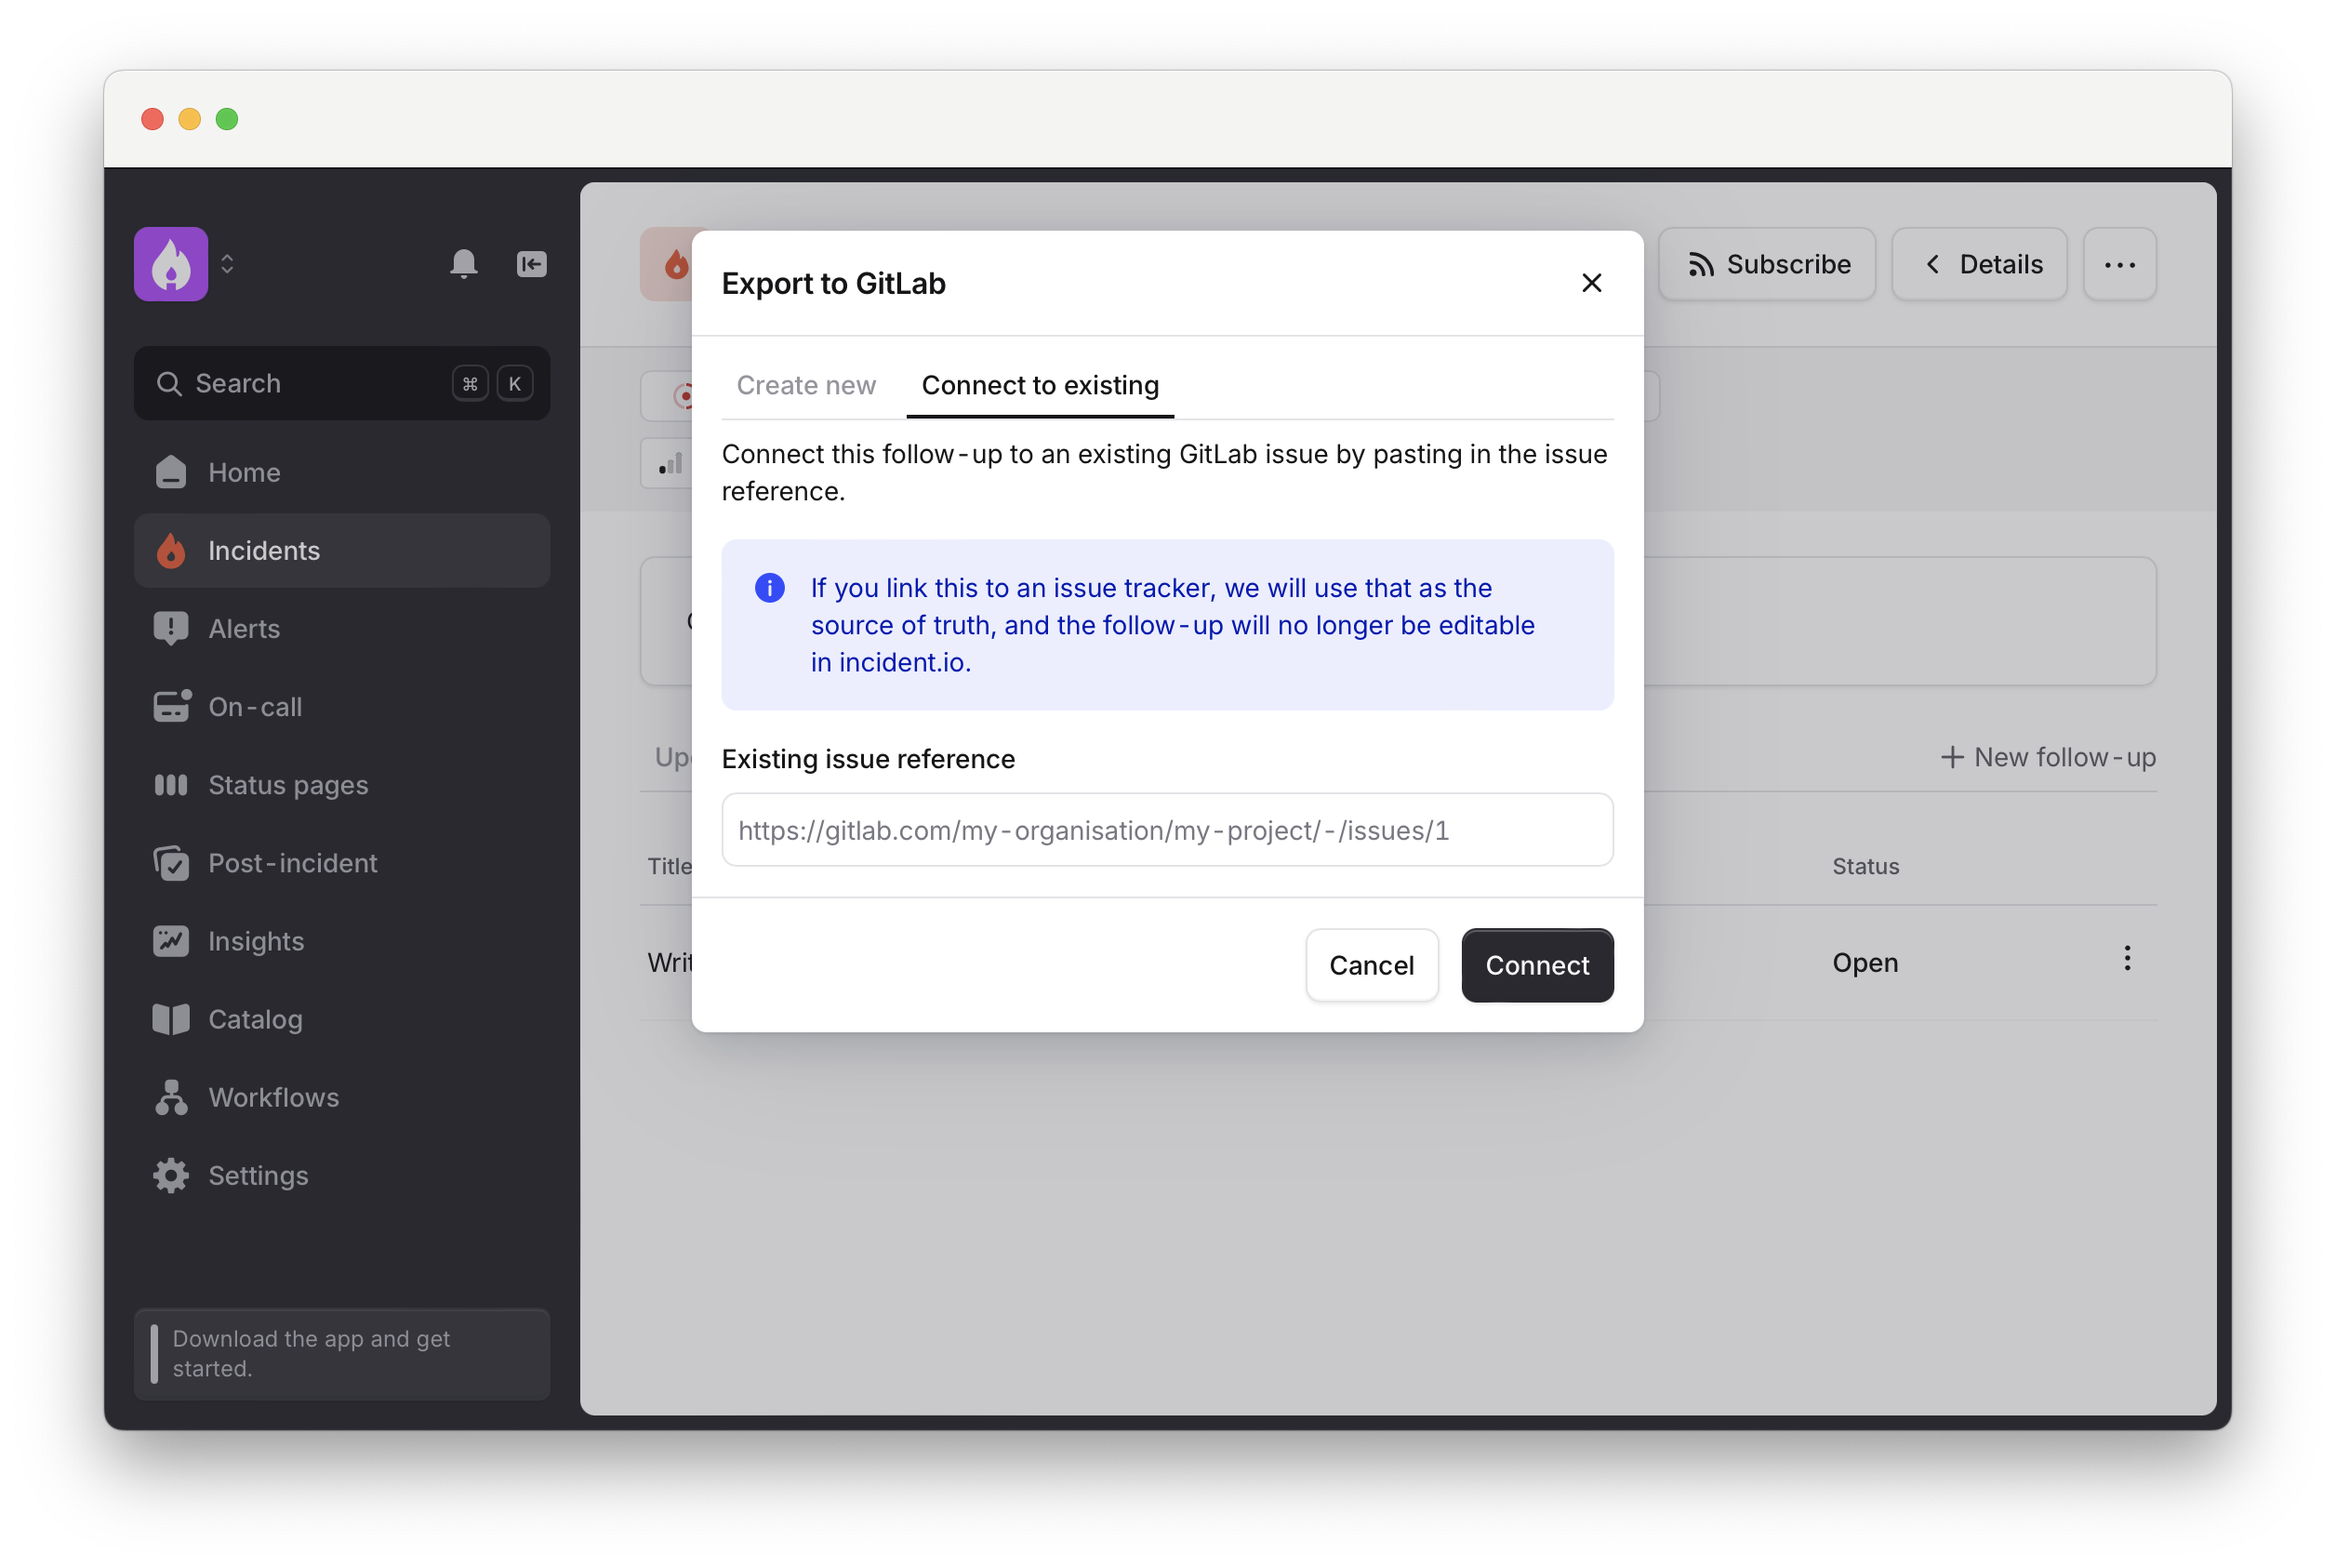
You can copy the reference of issues you already have and link them back to your incident.io follow-ups. Export to GitLab dialog on the Connect to existing tab, with an Existing issue reference field
  1. Attach GitLab Merge Requests to incidents from Slack
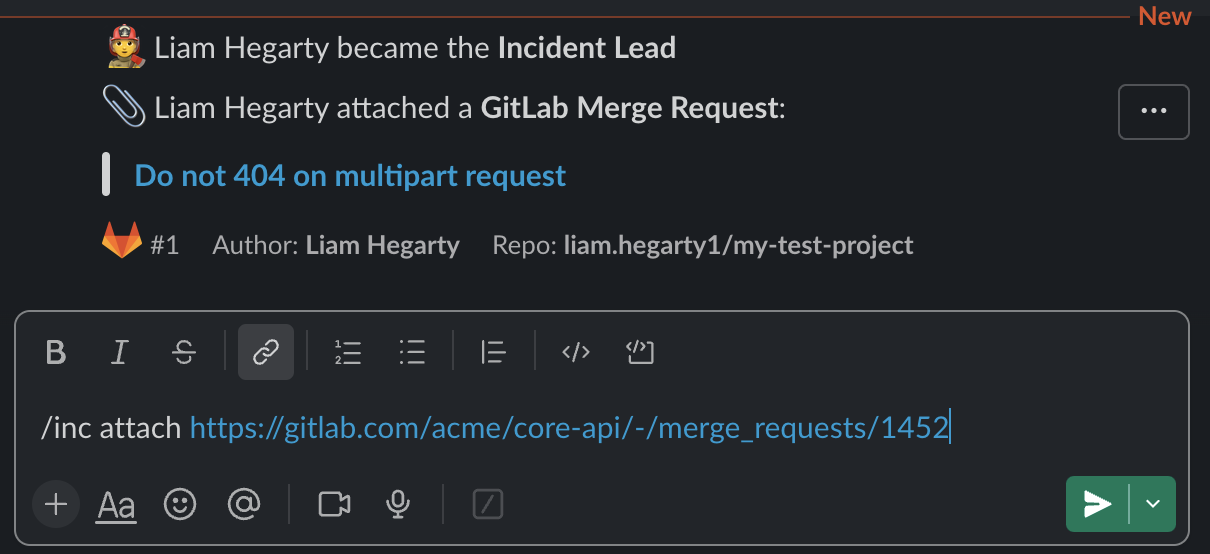
You can attach GitLab MRs to your incident directly from the incident channel. A Slack composer containing the /inc attach command and a GitLab merge request URL
  1. Attach GitLab MRs to incidents from GitLab

You can also attach an MR by mentioning the incident number in the MR title or source branch. A GitLab merge request retitled with INC-5, and an incident.io comment confirming the attachment
  1. Post comments on GitLab issues via workflows
Use workflows to automatically post internal comments on GitLab issues as incidents progress, keeping your team informed directly in GitLab.
  1. Track each incident as a GitLab issue
Set up incident tickets to create a GitLab issue for each incident and keep it up to date. Add the State field to your template to open and close the issue from the incident.

Setting Up

Adding GitLab to incident.io is simple.
You’ll need a GitLab top-level group owner to perform some of these steps.

1. Create a Service Account user in GitLab

Follow GitLab’s guide to creating a service account. We recommend using ‘incident.io’ for the name, since this will show up in the UI on issues and comments created by the integration.
Make sure the bot user has access to create and edit issues, and view and comment on merge requests in all relevant projects.
We recommend assigning the Reporter role to your incident.io service account user.
If connecting the GitLab integration for Investigations you should instead assign the Developer role. This allows Investigations to open Merge Requests when users request it.
See GitLab.com: Permissions and roles

2. Create a Personal Access Token

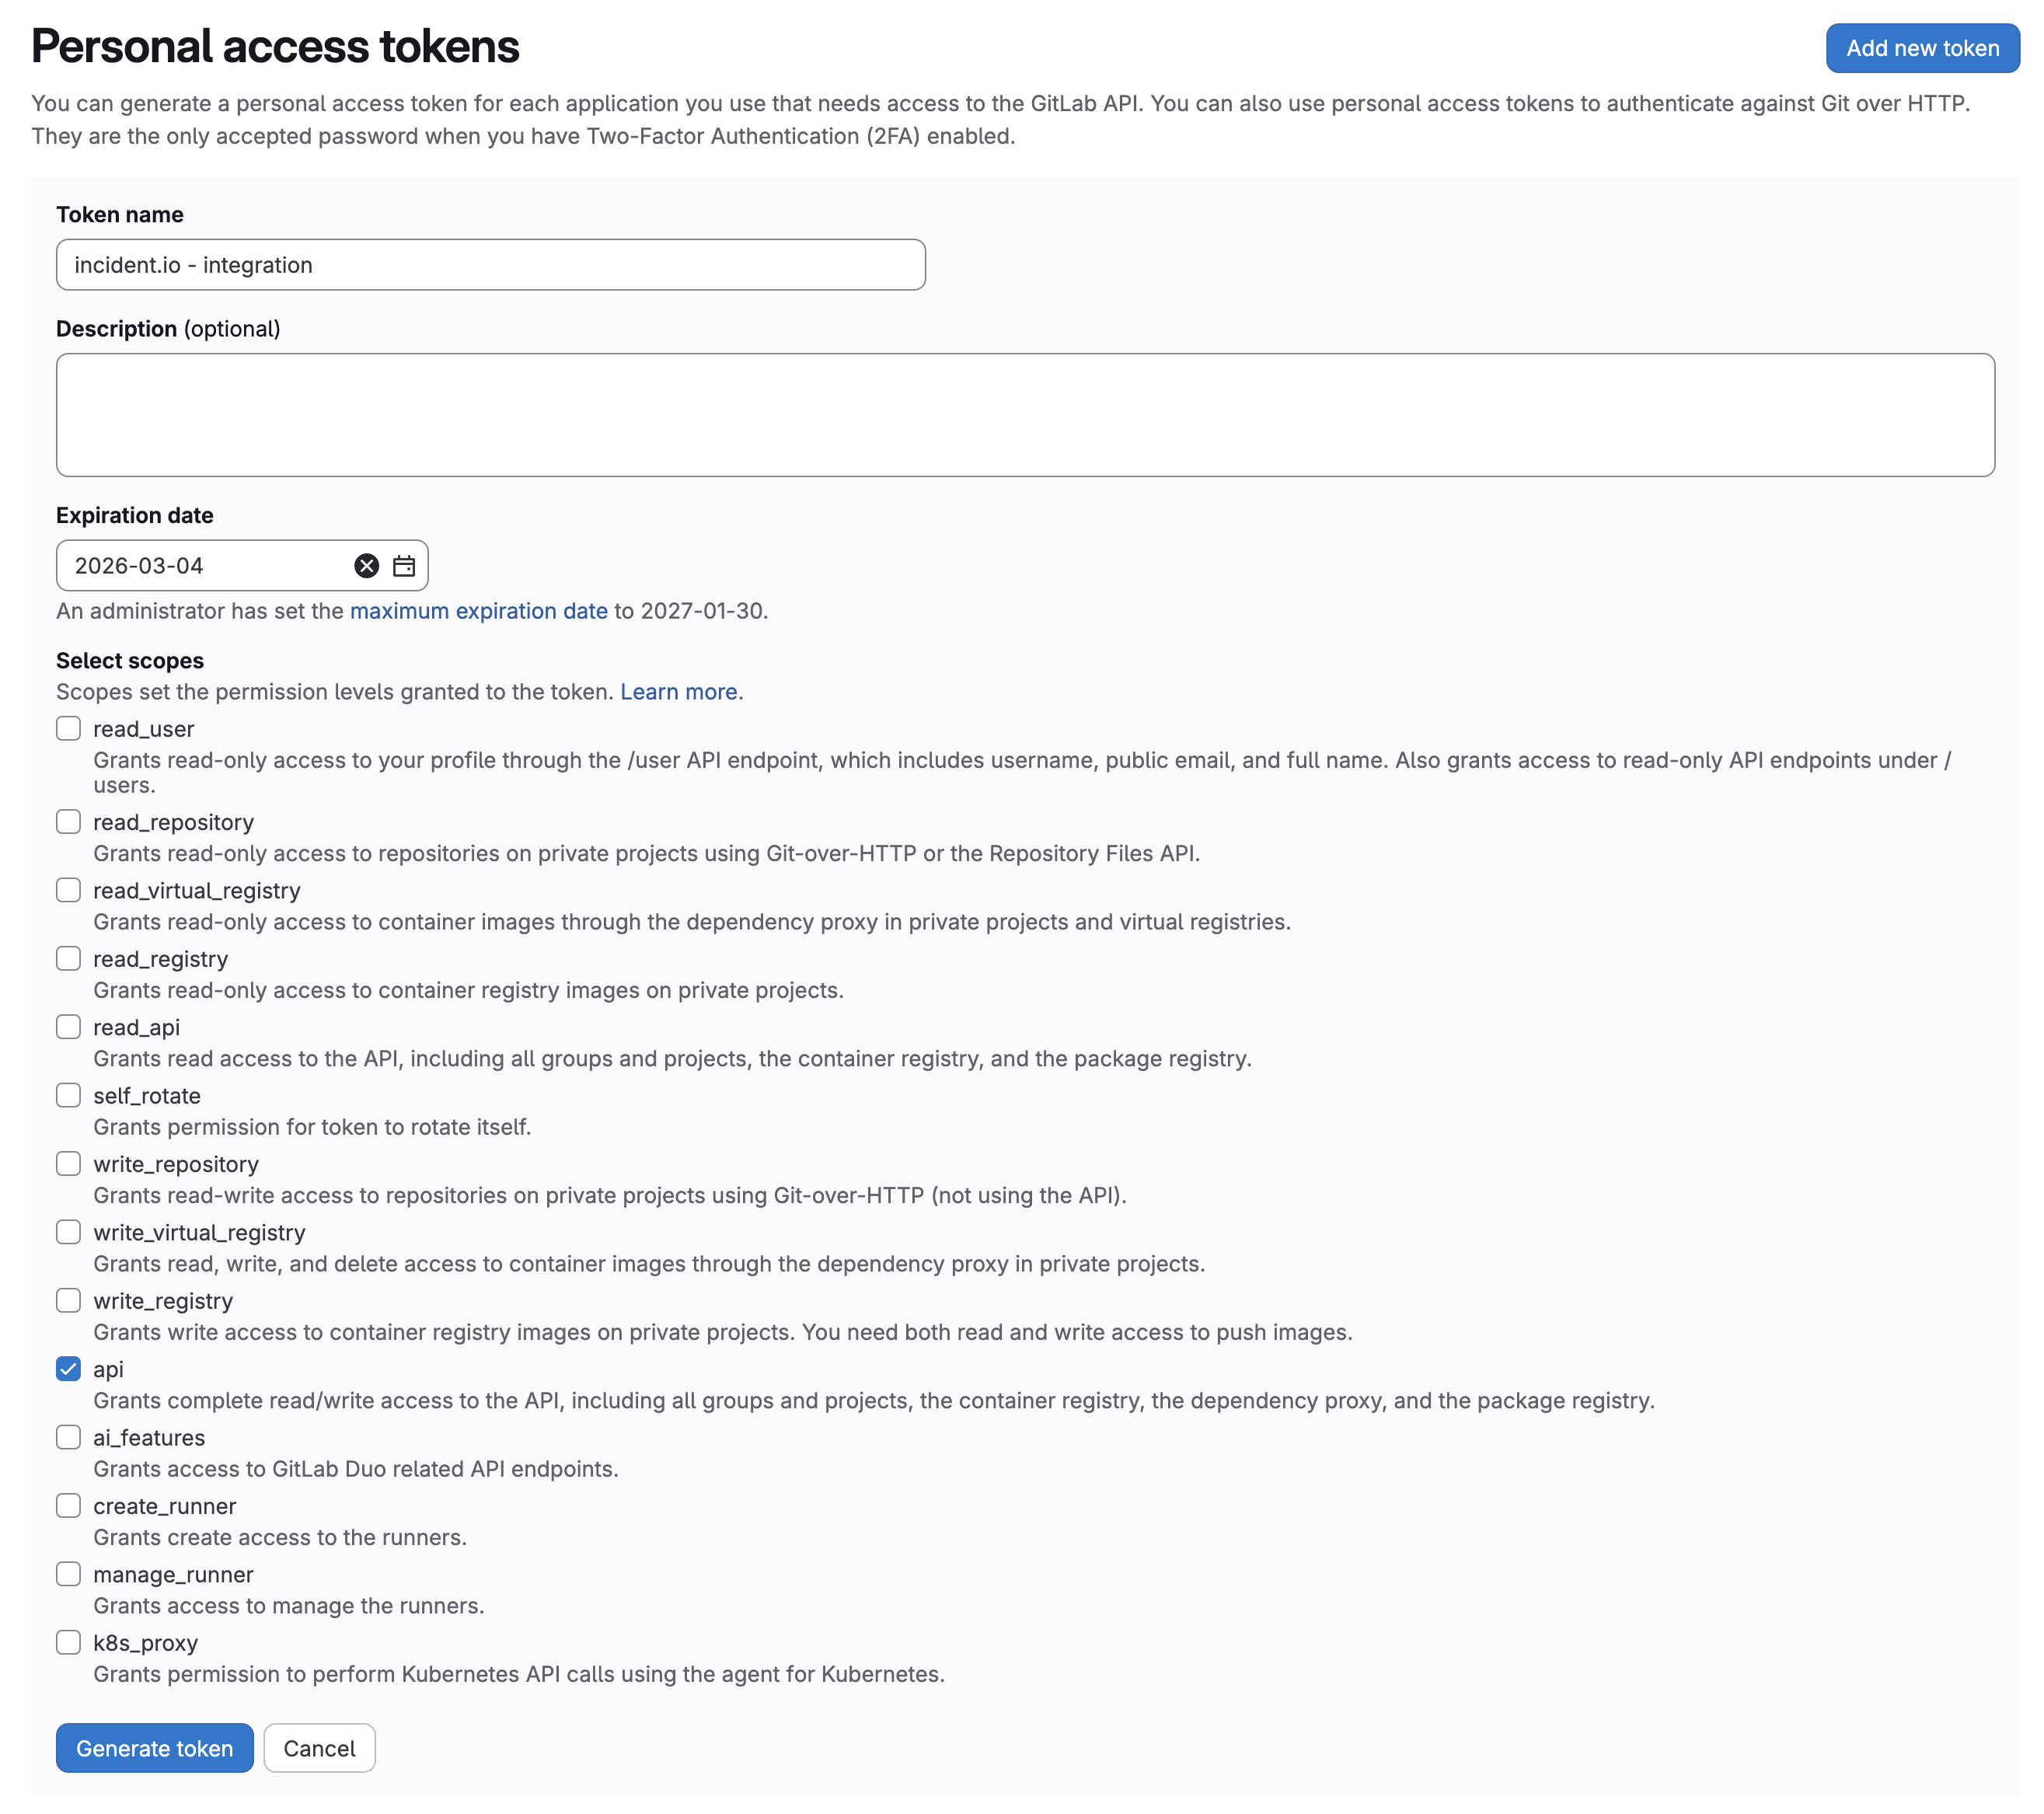
Follow GitLab’s guide here. For scopes the integration requires the api scope. Selecting the api scope when creating a GitLab personal access token After generating the token, make sure to copy the token value for the next step!

3. Connect the integration

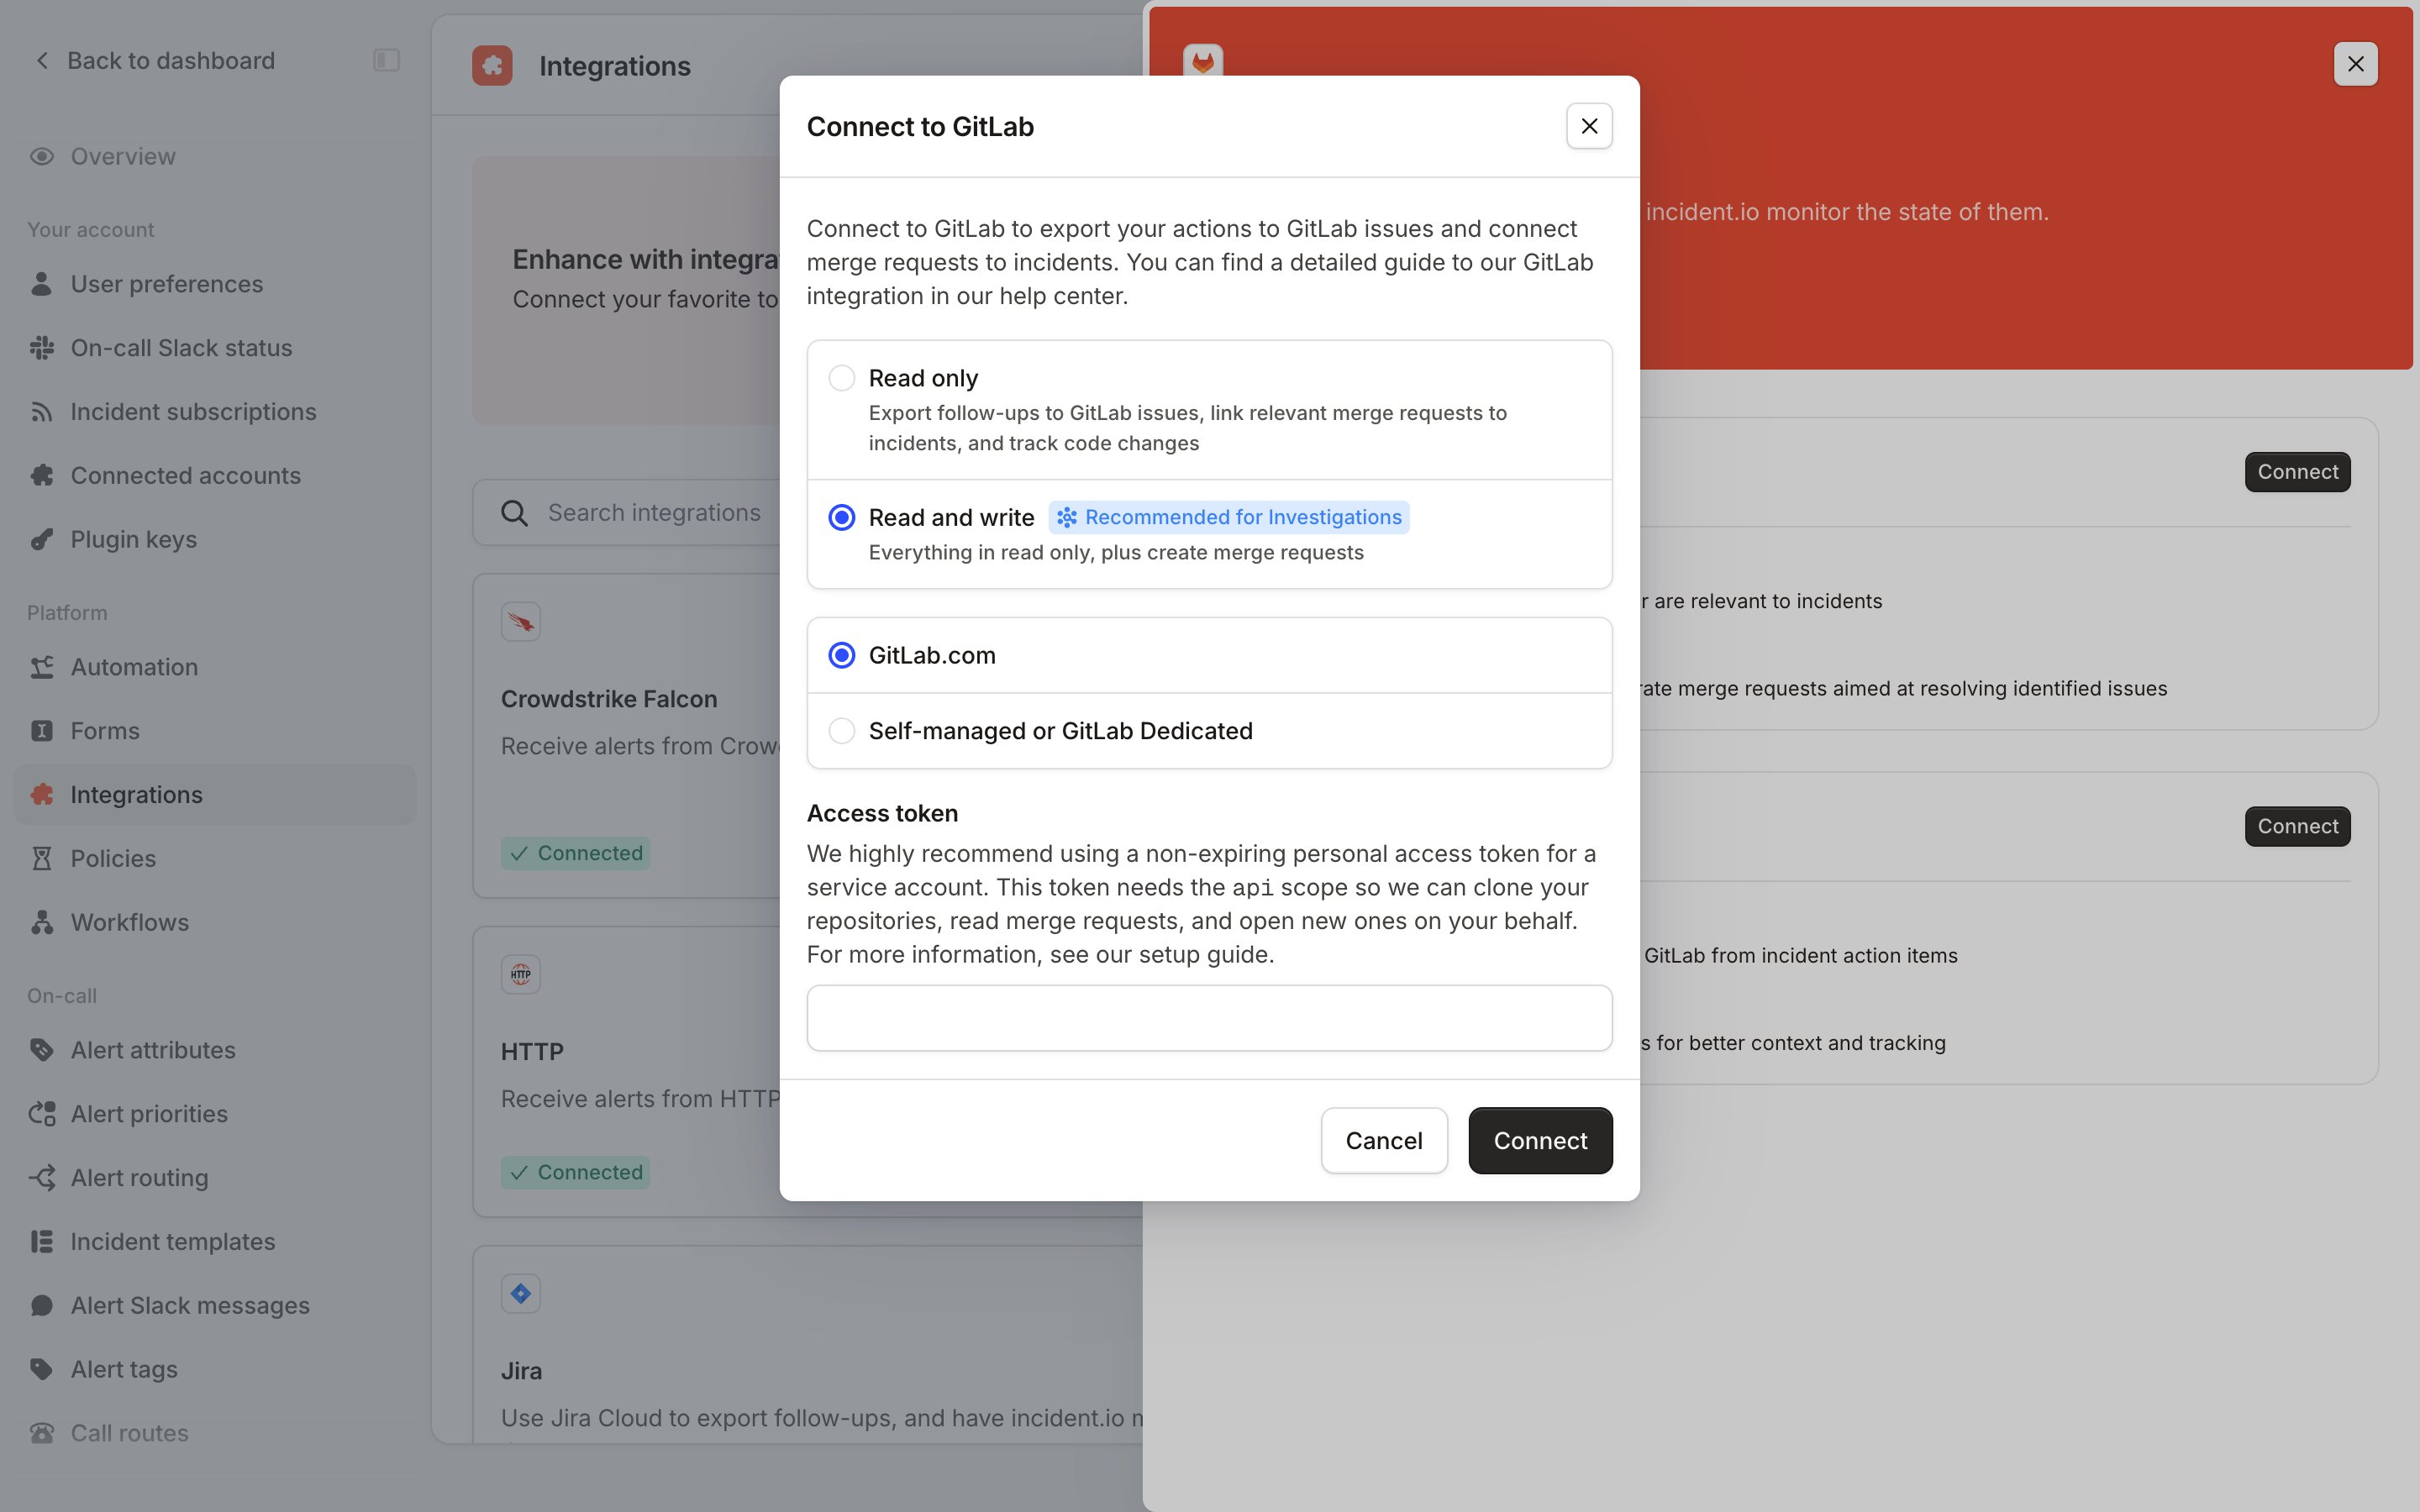
Go to Settings → Integrations, click on GitLab, then Connect. Connect to GitLab dialog with Read and write, GitLab.com and an Access token field selected Paste in the access token created in step 2. and click Connect. That’s it
For GitLab users to connect with their incident.io accounts, their GitLab public email must:
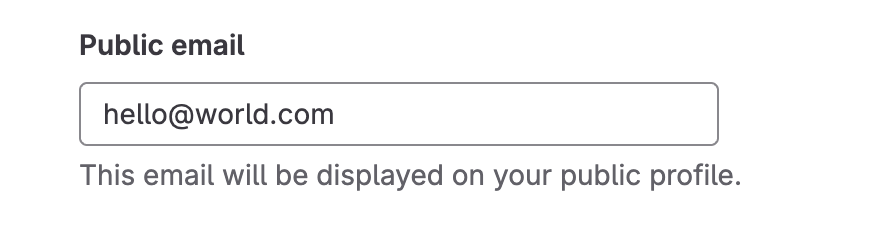
  1. Match their incident.io user email
  2. Be visible on their GitLab profile
GitLab profile settings showing the public email field
If you’re using self-managed GitLab, how you connect depends on where your instance runs:
  • Reachable from the internet: make sure traffic from our IPs can reach your instance.
  • Private network: route our requests through a proxy instead of exposing the instance.

Next up

We recommend adding a Group Hook in GitLab, which allows us to sync changes in GitLab back to incident.io. Read our setup guide here. If you run into any issues, get in touch